Hey there, crafty pals! Ever wondered how to make your tumblers truly one-of-a-kind? Sublimate tumbler in oven. Well, get ready to dive into the amazing world of tumbler sublimation! It’s like turning your favorite cup into a canvas for your imagination.
Meet Crafty Cathy, just like you – someone who loves making cool things. In this guide, we’ll explore the secrets of sublimating tumblers in the oven. Imagine your designs becoming part of the tumbler itself, lasting through every sip and wash!
Now, you might be thinking, “Subli-what?” Don’t worry; it’s just a fancy way of saying we’re going to use heat to create awesome designs. In simple terms, it’s like magic for your drinkware.
How to sublimate tumbler in oven? Grip the trimmed edge of the design, ensuring it’s right up to the design itself, and roll the tumbler until the design is in place. So, grab your favorite tumbler, and let’s get ready to turn it into a work of art!
How Does Sublimation Work? Unveiling the Magic
Sublimation Simplified: Turning Colors into Tumbler Art
So, let’s break down the mystery of sublimation. Imagine your tumbler as a magical canvas. The trick lies in using special inks that turn into gas when heated. This gas then merges with the tumbler, making your design a permanent part of it. No peeling or fading here – just long-lasting, vibrant art!
Understanding the Magic Behind Sublimation
Let’s go a bit deeper. Sublimation works because of heat and pressure. When you apply heat, the ink transforms into a gas, and under pressure, it fuses with the tumbler’s surface. It’s like giving your tumbler a colorful hug! This process ensures your designs stay put, ready to bring joy with every use.
Why Sublimation? A Crafty Choice for Lasting Impressions
Unlike stickers or decals, sublimation means your designs become one with the tumbler. Say goodbye to peeling corners or faded colors. Your crafted tumblers will withstand the test of time and countless sips. Now, that’s the kind of magic any craft enthusiast would love!
Getting Ready: Tools and Materials for Tumbler Sublimation
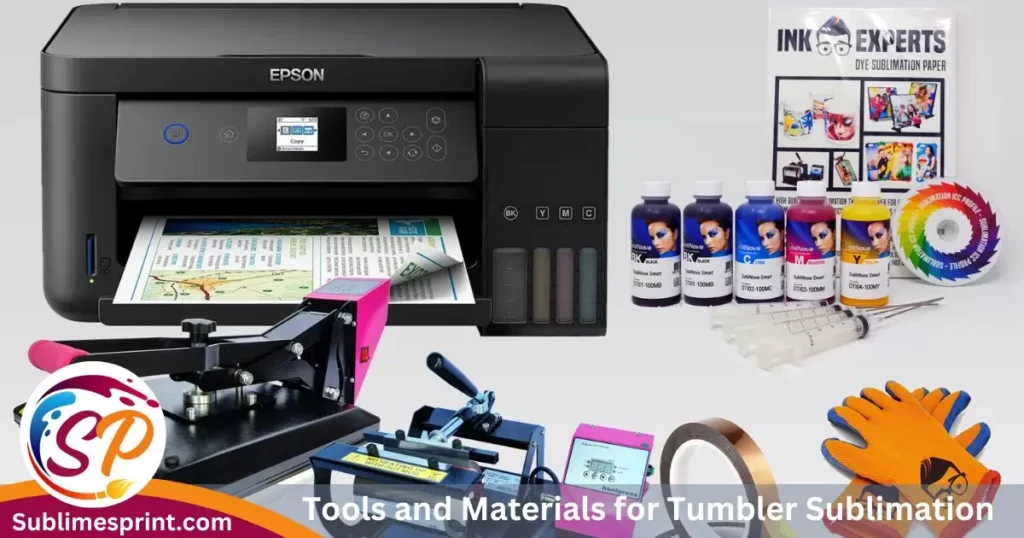
Tools of the Tumbler Trade: What You Need to Start
Alright, let’s gear up for some serious tumbler magic! Before diving into the sublimation process, let’s make sure you’ve got all the right tools.
Choosing Your Tumbler Canvas
First things first – pick the right tumbler. Stainless steel and polymer-coated tumblers work best for sublimation. These materials can handle the heat and pressure, ensuring your designs stick around for the long haul.
The Artistic Ink: Sublimation Ink 101
Now, let’s talk ink. Say hello to sublimation ink – the superhero of this crafting adventure. This special ink is designed to transform from a liquid to a gas under just the right conditions. Choose quality ink to guarantee your designs pop with vibrant colors.
Tools of the Trade
Gather your arsenal! You’ll need a few key items: heat-resistant tape, sublimation paper, and, of course, your creativity. The tape secures your design in place, the sublimation paper is where your design lives temporarily, and your creativity? Well, that’s the real star of the show.
Equipping yourself with the right tools is like preparing for a grand adventure. So, grab your tumbler, roll up your sleeves, and let’s make sure you’re all set for the mesmerizing world of tumbler sublimation!
Crafting Your Vision: Preparing a Tumbler Design
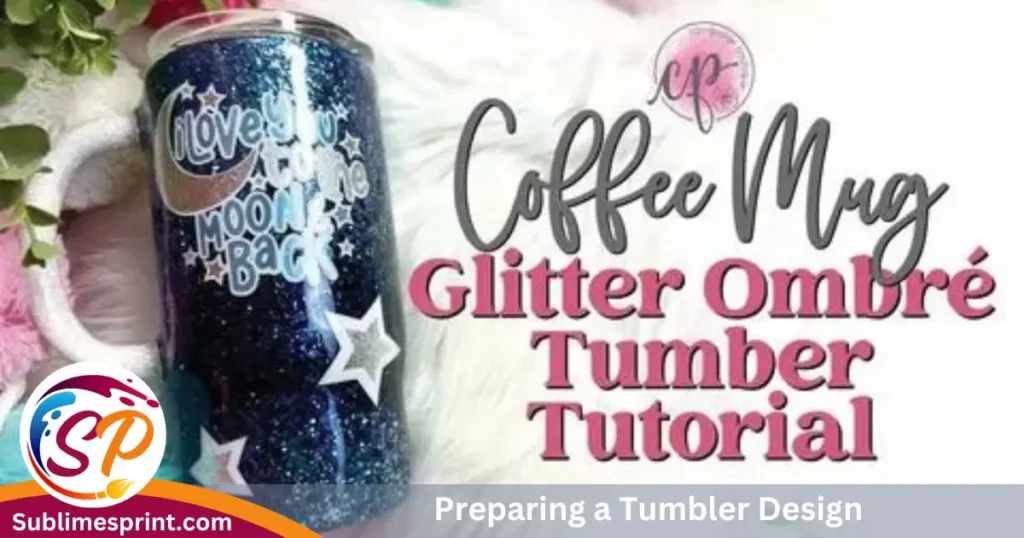
From Imagination to Reality: Designing Your Unique Tumbler
Now that we’ve gathered our tools, it’s time to unleash our creativity! Designing your tumbler is where the real fun begins.
Let Your Imagination Soar
Picture your tumbler as a blank canvas waiting for your personal touch. Don’t worry if you’re not a digital whiz – there are user-friendly design tools like Adobe Illustrator or CorelDRAW that can help bring your ideas to life. Dive in, experiment, and let your imagination run wild.
Sizing and Positioning Your Design
Before we hit the oven, consider the size and placement of your design on the tumbler. A well-thought-out design enhances the overall aesthetics. Don’t rush this step; it’s like setting the stage for your creative masterpiece. Make sure your design is just the way you want it before moving to the next exciting phase.
With your design ready to roll, you’re now on the brink of turning an ordinary tumbler into a personalized work of art. In the following sections, we’ll guide you through the fascinating process of sublimating your carefully crafted designs onto your tumbler using the magic of heat. So, let’s keep the creative vibes flowing as we embark on this artistic journey!
Setting the Stage: Creating Your Sublimation Workspace
Crafting Haven: Preparing Your Space for Tumbler Sublimation
Before we dive into the oven magic, let’s ensure your crafting space is ready for the spotlight. Creating the perfect sublimation workspace is key to a smooth and enjoyable crafting experience.
A Breathable Environment
First things first, let’s talk about ventilation. Ensure you’re working in a well-ventilated area. The magic of sublimation involves heat, and good airflow is your crafting ally. Open a window, turn on a fan – let that fresh air in!
Safety First with Sublimation

Safety is non-negotiable. When working with sublimation materials, be sure to take necessary precautions. Use protective gear like gloves and goggles to shield yourself from any potential mishaps. Craft confidently, knowing you’ve got your safety game on point.
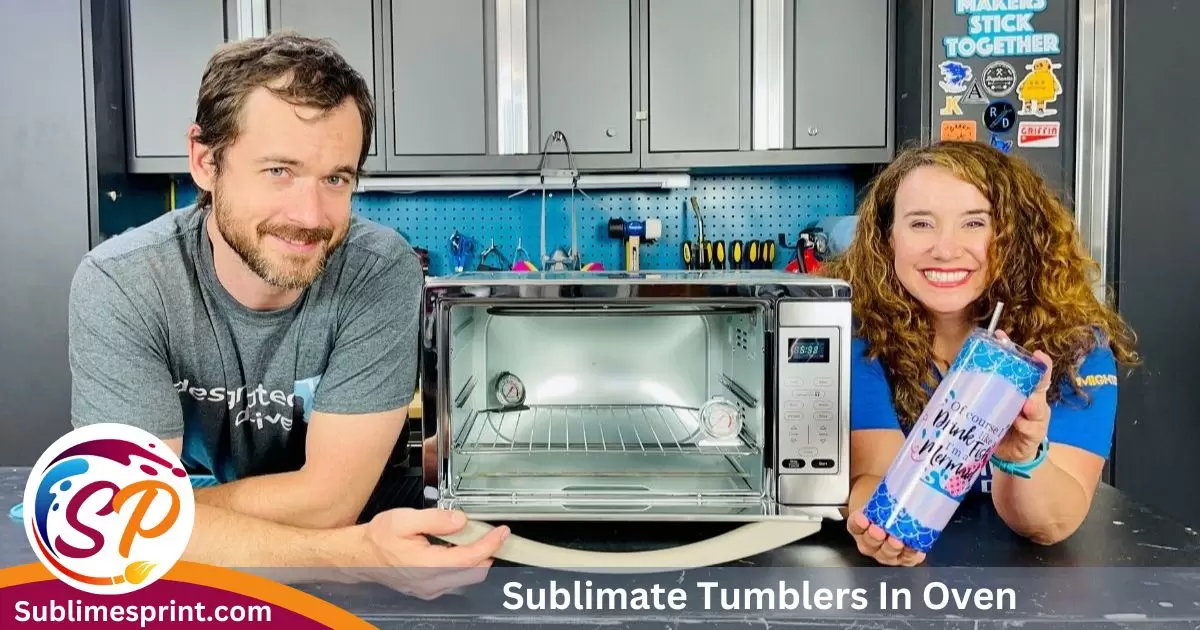
Oven Setup for Sublimation
Now, let’s talk about the star of the show – your oven. Ensure your oven is clean and ready for action. Preheat it to the recommended temperature, setting the stage for the sublimation process.
This is where your tumbler will undergo its magical transformation, so let’s make sure the setting is just right.
With your crafting space prepped and your safety gear in place, you’re all set to dive into the exciting world of sublimating tumblers in the oven.
Read Also: A Sub Sublimation Paper Instructions
The Magic Begins: Sublimating Tumblers in the Oven
Transformative Heat: Step-by-Step Guide to Tumbler Sublimation
Get ready for the enchanting moment – it’s time to turn your designs into a tumbler masterpiece using the magic of heat and sublimation. Follow these steps to ensure your tumbler sublimation journey is both seamless and mesmerizing.
Prepping Your Tumbler
Start by making sure your chosen tumbler is clean and free from any dust or debris. A clean canvas ensures your design adheres flawlessly.
Securing Your Design
Use heat-resistant tape to secure your sublimation paper with the design onto the tumbler. This step ensures your design stays in place during the sublimation process.
Into the Oven It Goes
Place your prepared tumbler into the preheated oven. The oven’s heat is about to work its magic, turning the sublimation ink into a gas that will bond with the tumbler’s surface.
Timing is Everything
Keep a close eye on the clock. The sublimation process typically takes around 15-20 minutes. This is the crucial moment where your design transforms from ink to a vibrant part of the tumbler.
Cool Down and Admire
Once the timer beeps, carefully remove your tumbler from the oven. Allow it to cool down, and there you have it – a personalized tumbler ready to make a statement with every sip.
This step-by-step guide ensures that your tumbler sublimation process goes off without a hitch. With the oven as your creative partner, you’re now equipped to turn plain tumblers into personalized works of art.
Stay tuned for the next sections, where we’ll explore troubleshooting tips and ways to ensure your creations stand the test of time. The magic of tumbler sublimation continues!
Tackling Challenges: Troubleshooting Common Issues in Tumbler Sublimation
Navigating Bumps in the Crafty Road: Fixing Sublimation Hiccups
No creative journey is without its challenges. Let’s explore some common issues that might crop up during your tumbler sublimation process and how to overcome them.
Color Discrepancies: Bringing Hue Harmony
The Challenge: Your final design doesn’t match the vibrant colors you envisioned.
Solution: Adjust your sublimation settings. Experiment with temperature and timing to find the sweet spot that brings out the true colors in your design. Also, ensure your sublimation paper and ink are of high quality.
Image Distortion: Keeping It Picture-Perfect
The Challenge: Your design looks distorted or stretched after sublimation.
Solution: Double-check your design dimensions before printing. Ensure it fits the tumbler’s surface appropriately. If distortion persists, consider adjusting the pressure settings during sublimation.
Uneven Sublimation: Creating Consistent Beauty
The Challenge: Parts of your design seem more vibrant than others.
Solution: This could be due to uneven pressure or positioning in the oven. Make sure your tumbler is placed centrally in the oven, and consider rotating it halfway through the sublimation process for uniform results.
By addressing these common challenges, you’ll be better equipped to tackle any hurdles that come your way during the tumbler sublimation process.
Making Your Designs Last: Ensuring Durability for Sublimated Tumblers
Keeping Your Crafted Tumblers as Bright as Your Ideas
Now that you’ve mastered the art of sublimating tumblers, let’s make sure your creations stand the test of time. We’ll explore some simple tips to ensure your designs remain vibrant and beautiful through countless sips and washes.
Choosing Quality Materials

Using high-quality materials is like giving your tumbler a strong foundation. Opt for premium sublimation ink and paper to ensure your designs remain sharp and vivid. Investing in quality materials upfront pays off in the durability of your finished product.
Proper Care and Maintenance
Just like any masterpiece, your sublimated tumblers need a little TLC. Handwashing is preferable to maintain the integrity of the design. Avoid harsh abrasives or dishwasher use, as they can dull the vibrancy of your artwork.
Seal the Deal: Protecting Your Design
Consider adding an extra layer of protection to your designs by using a clear sealant or coating. This helps guard against scratches and fading, ensuring your personalized tumblers stay as stunning as the day you created them.
By incorporating these simple steps into your crafting routine, you’re not just making tumblers; you’re creating lasting memories.
Your personalized designs will become cherished companions for those quiet moments with your favorite drink. Stay tuned for more creative ideas and inspiration as we continue our journey through the world of tumbler sublimation!
discourage you; they’re just part of the crafting adventure!
Let’s Get Creative: Ideas for Personalized Tumbler Designs
Unleashing Your Imagination: Crafting Beyond the Basics
Now that you’ve mastered the essentials of tumbler sublimation, it’s time to let your creativity soar. Here are some fun and easy ideas to inspire your next personalized tumbler projects.
Celebrate Special Moments
Turn ordinary occasions into extraordinary memories. Create personalized tumblers for birthdays, anniversaries, or graduations. Add names, dates, or special messages to make each sip a celebration.
Themed Tumblers for Every Mood
Explore different themes to match your mood or interests. Whether it’s a tropical paradise, galaxy adventures, or cute animals, your tumbler can reflect your passions. Let your imagination run wild and infuse your personality into every design.
Family and Friends’ Favorites
Craft personalized tumblers for your loved ones. Consider their hobbies, favorite colors, or quotes that resonate with them. It’s a thoughtful way to show you care and adds a personal touch to gift-giving.
These creative ideas are just the beginning. Remember, there are no limits to what you can design. The joy of tumbler sublimation lies in turning everyday items into personalized treasures. Stay tuned for more tips and tricks as we continue our crafting journey!
People also ask
Can you sublimate tumblers in a regular oven?
Yes, you can! A regular household oven is a great tool for sublimating tumblers, making it accessible for crafters at home.
How long to bake sublimation tumblers in the oven?
Baking time is typically around 15-20 minutes. Keep an eye on your timer to ensure your designs transform into vibrant, lasting artwork.
Can sublimation be done in the oven?
Absolutely! Sublimation in the oven is a convenient and effective method. It allows you to infuse your designs onto tumblers, creating personalized and durable pieces.
What temperature do you sublimate tumblers?
Set your oven to a temperature around 375°F (190°C) for sublimating tumblers. This heat activates the sublimation process, turning your designs into a lasting part of the tumbler’s surface.
So, preheat that oven, gather your materials, and get ready to turn your plain tumblers into personalized works of art! Happy crafting!
conclusion
You’ve successfully delved into the enchanting world of tumbler sublimation. Let’s recap the key steps in this magical crafting journey.
Creating personalized tumblers becomes a breeze when you understand the basics. Remember to choose the right materials, design with care, and follow the simple steps for sublimation in your oven.
Troubleshooting challenges? No worries! Adjust settings, double-check your designs, and keep that crafting spirit alive.
To ensure your creations withstand the test of time, invest in quality materials, practice proper care, and consider adding a protective seal.
Now, armed with these crafting insights, you’re ready to explore endless possibilities, from special occasions to themed designs for family and friends.
So, take a moment to bask in your crafting achievement. You’re not just making tumblers; you’re crafting memories that last. Stay tuned for more crafting adventures and inspiration. Happy crafting, and cheers to your personalized tumbler masterpieces!

I’m James Wilson, the driving force behind “Sublimes Print.” I’ve been deep in the world of sublimation printing, bringing my expertise and hands-on experience to the table. With a robust background in the art of sublimation printing, I’m all about sharing insights, exploring industry innovations, and fostering a collective appreciation for the craft.
So, join me on this printing journey, where we dive into the intricacies of sublimation and celebrate the beauty it brings to the world of printing!