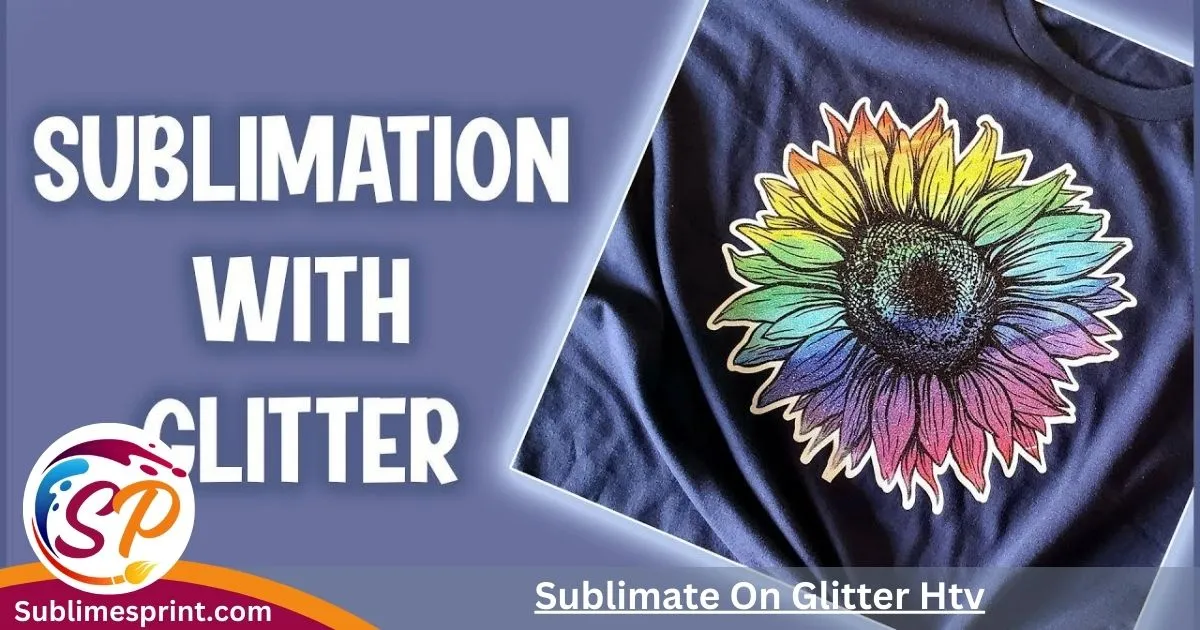
Hey Crafty Pals! Ever wondered how to make your DIY projects sparkle and shine? Well, get ready for an adventure into the world of crafting magic! Sublimate on glitter. Today, we’re exploring something super cool – it’s called sublimation on glitter Heat Transfer Vinyl (HTV).
Now, glitter HTV isn’t your regular craft vinyl – it’s like normal vinyl, but with a touch of glittery awesomeness. And guess what?
When you add sublimation into the mix, you get a burst of colors and creativity like never before! So, if you’re a crafty explorer looking to add a dash of sparkle to your creations, stick around. We’re about to embark on a crafting journey that’ll make your projects shine brighter than ever!
How to sublimate on glitter htv? Put the printed transfer facing the glitter, then cover both with a sheet of copy or Kraft paper. Press down firmly for 60 seconds at a temperature of 365°F.
Understanding Glitter HTV and Sublimation
What is Glitter HTV?
Let’s start with the basics. Glitter HTV is like your regular craft vinyl, but with an extra touch of glittery goodness. When you heat it up, something magical happens – it sticks to surfaces with a dazzling sparkle. Think of it as adding a pinch of fairy dust to your projects!
Basics of Sublimation
Now, let’s talk about sublimation. It’s a fancy word for a cool printing process. Instead of ink turning into a liquid, it goes straight from solid to gas, creating vibrant prints.
When you combine this with glitter HTV, you’re not just crafting; you’re creating art that’s as unique as you are! Stay with me, and we’ll explore how to make this crafting magic happen. Ready for some fun?
Essential Tools and Materials
Equipment Needed
Now, before we dive into the crafting adventure, let’s gather our tools. To bring your glitter HTV sublimation dreams to life, you’ll need some key equipment:
Heat Press Machine: This is your crafting sidekick. It applies the right amount of heat and pressure to make your designs stick.
Sublimation Printer: An essential tool for transferring your vibrant designs onto the glitter HTV.
Choosing the Right Glitter HTV

Not all glitters are created equal! Choosing the perfect glitter HTV is crucial. Here’s how:
Explore Options: Check out different glitter vinyl types available. Each adds its own flair to your projects.
Compatibility Check: Ensure your chosen glitter HTV plays nice with sublimation. We want a crafting party, not a mismatch!
Having the right tools sets the stage for crafting success. Now, let’s move on and explore the fascinating world of design and preparation! Ready to turn your workspace into a crafting haven?
Preparation Steps
Designing Your Sublimation Project
Time to let your creativity flow! Designing your project is where the magic begins. Here’s the lowdown:
Tips for Personalized Designs: Think about what makes your project special. Add names, quotes, or funky patterns for that personal touch.
Digital Tools and Software: Don’t worry; you don’t need to be a tech genius! Use simple digital tools to create or customize your designs.
Preparing Glitter HTV Sheets
Now, let’s get hands-on with the glittery stuff. Prepping your glitter HTV is key:
Cutting and Weeding Techniques: Trim your vinyl with precision, and weed out the excess. Think of it as giving your design some breathing room.
Smooth Surface for Sublimation: Ensure your glitter HTV surface is smooth and clean. We want the heat press to work its magic without any bumps.
Read Also: Can You Sublimate On White Htv?
Sublimating on Glitter HTV: Step-by-Step Guide

Step 1: Preheating the Heat Press
Time to fire up the heat press! Before diving into the main act, let’s make sure it’s warmed up and ready to go:
Optimal Temperature and Time Settings: Consult your glitter HTV and sublimation equipment manuals for the perfect temperature and time. We’re aiming for that sweet spot!
Importance of Preheating: Just like a warm-up before exercise, preheating ensures the heat press is at its prime for flawless sublimation.
Step 2: Placing the Glitter HTV
Now comes the fun part – placing your glitter HTV on the stage! Let’s do this with precision:
Proper Alignment on the Substrate: Position your glitter HTV on the item you’re decorating. Think of it as setting the stage for your design to shine.
Avoiding Common Mistakes: Watch out for bubbles or uneven surfaces. Smooth out any issues before the grand reveal!
Step 3: Sublimation Process
Lights, camera, action – it’s showtime for sublimation! Follow these steps for a picture-perfect performance:
Transfer Paper Considerations: Choose the right sublimation transfer paper. It’s like selecting the perfect co-star for your glitter HTV.
Monitoring the Sublimation Reaction: Keep a close eye as the heat press works its magic. The transformation from solid to gas is the superhero moment of sublimation!
With these steps mastered, you’re on your way to becoming a sublimation superstar! Ready for some creative troubleshooting and best practices?
Troubleshooting and Best Practices
Common Issues with Glitter HTV Sublimation
Even crafting superheroes encounter challenges. Let’s tackle some common problems and turn them into victories:
Addressing Uneven Prints or Fading: If your colors aren’t dancing harmoniously, it might be a temperature or pressure issue. Adjust settings for a flawless performance.
Troubleshooting Heat Press Problems: Is your heat press not playing nice? Check for inconsistencies, uneven heat distribution, or faulty elements. A well-behaved heat press is key to crafting success!
Best Practices for Stunning Results
Now, let’s unlock the secrets to crafting greatness:
Tips for Vibrant and Long-Lasting Prints: Choose high-quality materials, follow recommended settings, and your creations will stay vibrant through countless adventures.
Maintaining and Caring for Sublimated Glitter HTV Projects: Treat your masterpieces with love! Follow care instructions to ensure they continue to shine bright.
With troubleshooting know-how and best practices in your crafting arsenal, you’re ready to create projects that not only sparkle but endure the test of time. Ready for the grand finale?
Creative Project Ideas
Personalized Apparel
Now that you’re a crafting maestro, let’s jazz up your wardrobe!
T-Shirts, Hoodies, and More: Take your plain tees and hoodies to the next level. Add names, funky designs, or even your favorite quotes. It’s like giving your clothes a personality makeover!
Showcasing Versatility in Fashion: Ever thought of creating a fashion statement with glitter HTV? Now’s your chance! Mix and match colors, experiment with patterns, and watch heads turn wherever you go.
DIY Gifts
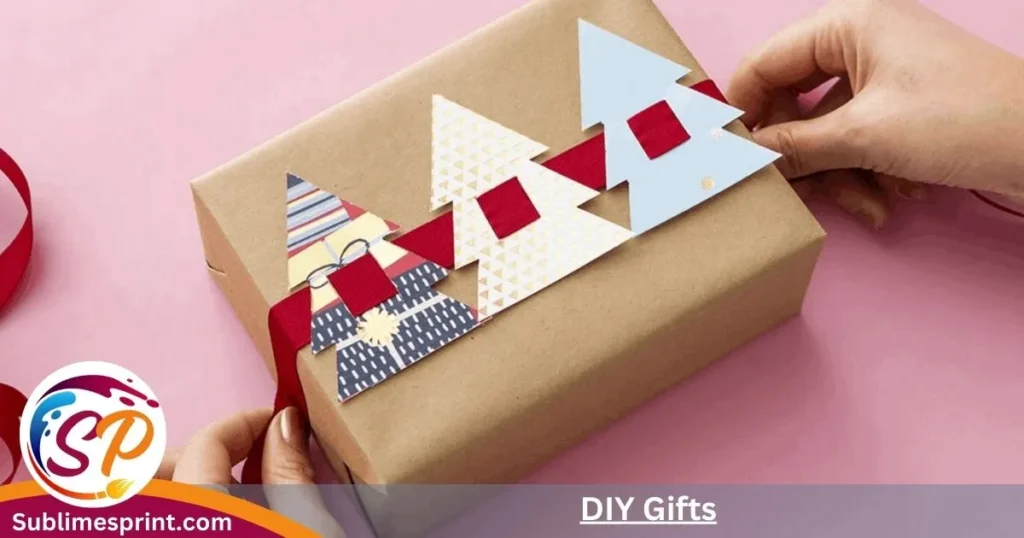
Spread the crafting love with personalized gifts for your loved ones!
Unique Gifts for Special Occasions: Birthdays, anniversaries, or just a random “thinking of you” moment – customize gifts that speak volumes without saying a word.
Spark Inspiration for Personalized Crafts: Share your creations on social media, inspire others, and create a crafting community. Who knows, your glittery wonders might be the spark someone else needs!
Crafting isn’t just about making things; it’s about creating joy, memories, and connections. So, grab your glitter HTV, fire up that heat press, and let your imagination run wild. Your crafting journey has just begun!
People also ask
Can you sublimate directly on glitter HTV?
- Yes, you can! Sublimation works its magic on glitter Heat Transfer Vinyl (HTV), adding vibrant colors to the glittery goodness. It’s like turning your sparkly canvas into a dazzling masterpiece.
How long to heat press sublimation on glitter vinyl?
- Patience is key! Heat pressing sublimation onto glitter vinyl usually takes around 20 to 30 seconds. Follow the recommended time in your equipment manual to ensure your project gets that perfect blend of glitter and color.
Can you sublimate on HTV vinyl?
- Absolutely! HTV, or Heat Transfer Vinyl, is a perfect companion for sublimation. When these two come together, you get a fusion of color and texture that can elevate your crafting game.
Can you press over glitter HTV?
- Yes, you can! Pressing over glitter HTV ensures your design stays secure and sparkly. Just make sure to follow the right temperature and pressure settings for a flawless finish. It’s like giving your glitter HTV an extra hug to stay in place.
Conclusion
Congratulations, Crafty Pal! You’ve just unlocked the secrets of sublimating on glitter HTV. Remember, crafting is all about joy and self-expression. Whether you’re turning a plain shirt into a masterpiece or creating heartfelt gifts, your journey is filled with endless possibilities.

I’m James Wilson, the driving force behind “Sublimes Print.” I’ve been deep in the world of sublimation printing, bringing my expertise and hands-on experience to the table. With a robust background in the art of sublimation printing, I’m all about sharing insights, exploring industry innovations, and fostering a collective appreciation for the craft.
So, join me on this printing journey, where we dive into the intricacies of sublimation and celebrate the beauty it brings to the world of printing!