Let’s imagine your garden as a canvas, and each personalized flag is like a brushstroke that adds a unique touch to the masterpiece. Personalized garden flags aren’t just decorations; they’re a fun and creative way to show off your style in your outdoor space. It’s like telling a story with colors and patterns right in your garden!
If you’re just starting with gardening or you’re already a pro, these personalized flags can bring a whole new level of charm to your garden. They make your outdoor space feel more like you, turning it into a colorful and inviting haven. So, get ready to explore the enchanting world of personalized garden flags and add a splash of personality to your green paradise.
Use a heat press to apply pressure. Place the sublimation print on top, ensuring full coverage. Use protective paper to cover everything.
Overview of Sublimation and Its Role in Customizing Garden Flags
Now, let’s talk about the magic behind making these cool personalized flags. It’s called sublimation, and it’s like a special trick to bring your designs to life. Sublimation is a way of printing that makes your designs become a part of the fabric itself. Think of it as creating super vibrant and long-lasting prints that won’t fade away.
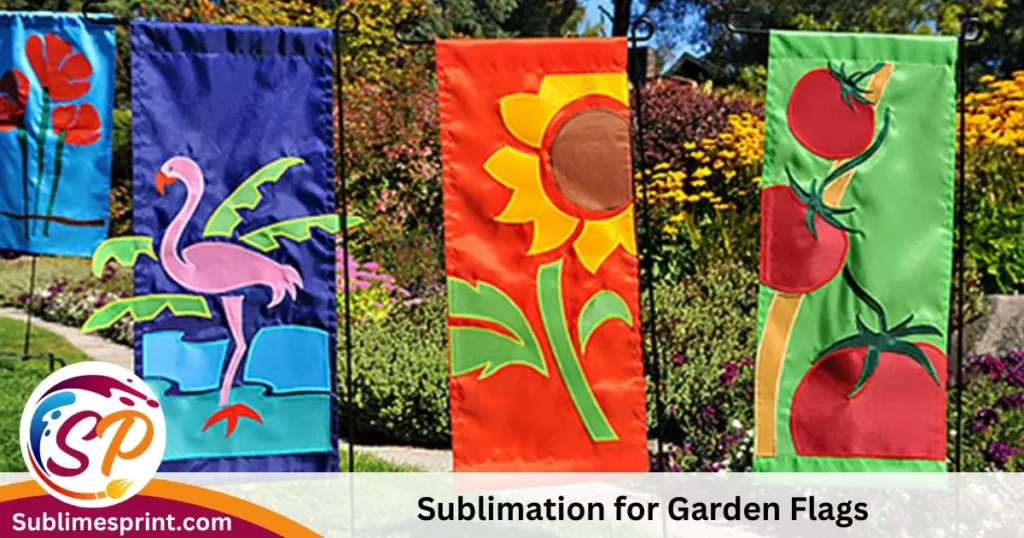
When we use sublimation for garden flags, it’s like opening a treasure chest of possibilities. You can create flags with all sorts of cool patterns, bright colors, and designs that match your love for gardening. As we go through this guide, we’ll show you the steps to use sublimation and turn your garden flags into unique pieces of art.
Understanding Sublimation for Garden Flags
Explaining Sublimation Printing Techniques
Now, let’s demystify sublimation printing. It’s like giving your designs a magic hug that makes them become one with the fabric. Here’s how it works: heat is used to turn special inks into a gas, and then they seep into the fabric, creating vibrant and full-color prints. This means your designs won’t just sit on the surface – they’ll be a part of the flag itself, making them durable and eye-catching.
Suitable Materials for Sublimating Outdoor Decor
Not all materials are created equal, especially when it comes to outdoor decor. For sublimation to work its magic, you’ll want to choose materials that can handle the elements. Polyester is a superstar here. It not only takes in the vibrant colors during sublimation but also stands strong against rain, sun, and wind. So, when picking your garden flag material, think polyester for durability and long-lasting beauty.
Choosing the Right Sublimation Inks for Fabric Flags
Now, let’s talk inks. Sublimation inks are like the superheroes of this process. They are specially made to turn from a solid to a gas and back into a solid again, all while bonding with the fabric. These inks ensure your designs stay vivid and don’t fade, even when faced with the unpredictable weather in your garden.
Weather Resistance and Durability Considerations
Our gardens face all kinds of weather, from scorching sun to pouring rain. That’s why it’s essential to choose materials and inks that can stand up to the elements. The beauty of sublimation is that it doesn’t just make your flags pretty; it makes them tough too. So, when you step into the world of sublimation, you’re not just creating beautiful flags – you’re creating ones that can brave the outdoor elements.
Preparing for Your DIY Project
Gathering Essential Sublimation Tools and Equipment
Before we jump into the fun part of designing, let’s make sure you have the right tools in your gardening toolbox. For sublimating your garden flags, you’ll need a few key items:
Sublimation Printer: This special printer is your artistic sidekick. It’s designed to use sublimation inks and bring your designs to life.
Sublimation Paper: Like the canvas for a painter, sublimation paper is what carries your design from the printer to the fabric.
Heat Press: This is the magic oven for sublimation. It uses heat to turn your designs into vibrant prints on the fabric.
Polyester Garden Flags: Remember our weather-resistant superhero material? That’s right – you’ll need polyester flags to make sure your creations last through sun, rain, and wind.
Selecting a Suitable Design for Your Garden Flag
Now comes the exciting part – choosing the design for your garden flag. This is where your creativity gets to shine! Whether you want a flag bursting with flowers, a geometric masterpiece, or even a flag featuring your favorite furry friend, the choice is yours. If you’re feeling stuck, take inspiration from your garden’s theme or colors.
Tips for Designing Unique and Eye-Catching Flag Patterns
Here’s a secret: your garden flag can be as unique as your fingerprint. Play with colors, experiment with patterns, and don’t be afraid to let your personality shine through. Consider symmetry, contrast, and balance to create a flag that not only looks amazing but also complements the beauty of your garden.
Understanding Heat Transfer for Optimal Results
Now, let’s talk about the heat press. It’s the magical moment where your design meets the fabric. Follow the instructions for your specific heat press machine, but generally, it involves placing your sublimation paper with the design on top of the polyester flag and letting the heat press do its work. This is where the transformation happens, and your garden flag becomes a piece of personalized art.
Step-by-Step Guide to Sublimating Your Garden Flag

Preparing the Flag Fabric for Sublimation
Now that you’ve got your design and tools ready, it’s time to prep your polyester flag for the sublimation process. Here’s a quick guide:
Clean and Smooth Surface: Ensure your flag is clean and free from any dust or debris. A smooth surface will result in a more even and vibrant print.
Securing the Flag: Use heat-resistant tape to secure the edges of your flag to the sublimation paper. This ensures that the paper stays in place during the heat press process.
Printing Your Design onto the Flag Material
Load your sublimation printer with the specially designed paper and hit print! Make sure your design is mirrored on the sublimation paper – this is a crucial step to ensure your final flag looks just as you designed it.
Heat Press Techniques for Flag Sublimation
Once your design is printed, it’s time for the heat press magic. Follow these steps:
Preheat the Heat Press: Get your heat press ready by preheating it to the recommended temperature.
Place the Flag and Sublimation Paper: Position your polyester flag with the sublimation paper on top, ensuring everything is flat and aligned.
Press and Hold: Close the heat press and apply firm, even pressure. Hold for the recommended time, allowing the heat to transfer your design onto the fabric.
Peel and Reveal: After the timer beeps, carefully peel away the sublimation paper to reveal your vibrant, personalized garden flag.
Ensuring Longevity: Post-Sublimation Care and Maintenance
Congratulations, you’ve just created a masterpiece! To ensure your garden flag stands the test of time:
Cooling Period: Allow your flag to cool completely before handling.
Avoid Abrasives: Treat your flag gently. Avoid rough handling or abrasive materials to maintain the integrity of the print.
Outdoor Display: Polyester is tough, but to maximize longevity, consider bringing your flag indoors during severe weather conditions.
Read Also: Can You Sublimate On Bamboo Wood
Adding Personal Touches to Your Garden Decor
Creative Ideas for Personalized Garden Flag Designs
Your garden flag is just the beginning of the personalized magic you can bring to your outdoor space. Here are some creative ideas to take your garden decor to the next level:
- Matching Themes: Coordinate your flag with the overall theme of your garden. If you have a floral paradise, consider a flag with vibrant flowers.
- Seasonal Switch-Ups: Change your flags with the seasons. Think spring blossoms, summer sunshine, autumn leaves, and winter wonders.
- Family Fun Flags: Create flags that represent each family member. Whether it’s a favorite color or a symbol that represents them, let each flag tell a unique story.
Incorporating Custom Elements That Reflect Your Style
Garden decor is all about reflecting your personality. Consider these custom elements to make your outdoor space truly yours:
- DIY Plant Markers: Personalize plant markers with the names of your favorite flowers or herbs. It adds a touch of charm and helps you keep track of your green friends.
- Hand-Painted Pots: Turn ordinary pots into works of art with your favorite colors and patterns. It’s a simple yet effective way to personalize your garden.
Unique Patterns and Color Combinations for Garden Flags
When it comes to patterns and colors, the sky’s the limit. Mix and match different patterns for a vibrant look, or stick to a monochromatic theme for a more sophisticated feel. Experiment with different combinations until you find the one that speaks to you and complements your garden’s natural beauty.
Tips for Infusing Personality into Outdoor Sublimation Projects
The key to making your garden truly yours is to infuse it with your unique personality. Don’t be afraid to think outside the box:
- Upcycled Art: Turn old items into unique garden art. From repurposed furniture to vintage finds, let your creativity run wild.
- Themed Corners: Create themed corners in your garden – a reading nook with cozy chairs, a butterfly garden, or even a mini herb garden. Each corner can reflect a different aspect of your personality.
Enhancing Your Outdoor Space with Custom Flags
Showcasing Your Sublimated Garden Flags
Now that you’ve mastered the art of personalizing garden flags, it’s time to showcase your creations. Consider these tips for displaying your flags in the best light:
Flag Poles and Stands: Invest in sturdy flag poles or stands to ensure your flags are displayed proudly. Adjustable heights allow for versatility in your garden design.
Strategic Placement: Think about where your flags will have the most impact. Whether it’s near your favorite flowers or along a garden pathway, strategic placement enhances the overall aesthetic.
Complementing Flag Designs with Garden Layouts
Your personalized flags should seamlessly blend with your garden layout. Consider these design tips to create a harmonious outdoor space:
Color Coordination: Match flag colors with the predominant colors in your garden. This creates a cohesive look that ties everything together.
Balance and Symmetry: Arrange your flags in a way that creates balance. Whether you have one striking flag as a focal point or a series of flags guiding a path, aim for symmetry to enhance visual appeal.
Using Flags as Focal Points in Your Landscape Design
Think of your personalized flags as the stars of your garden show. Here’s how to make them stand out:
Contrasting Elements: If your garden is lush and green, opt for flags with vibrant colors that pop. Create a contrast that draws attention to your personalized masterpieces.
Height Variation: Play with the heights of your flags. Some flags can stand tall on poles, while others might be closer to the ground. This variation adds visual interest to your landscape.
Benefits of Customization in Outdoor Decor
The beauty of personalized garden decor goes beyond aesthetics. It adds a personal touch that transforms your outdoor space into a haven. Consider the benefits:
- Reflecting Your Personality: Personalized decor tells your story, creating a space that feels uniquely yours.
- Creating a Relaxing Atmosphere: A well-designed garden contributes to a calming atmosphere. Personal touches make it a place you love to unwind.
FAQs
Can you sublimate on both sides of a yard flag?
Yes, you can sublimate on both sides of a yard flag, but it’s important to keep in mind that the sublimation process primarily affects the side that comes into direct contact with the sublimation paper. The ink may partially penetrate to the other side, but the main design will be on the side that was pressed against the paper during sublimation. If you want a fully double-sided effect, you may need to sublimate each side separately.
Do you let sublimation cool before peeling?
Absolutely! After the sublimation process, it’s crucial to let your project cool completely before peeling away the sublimation paper. This cooling period allows the ink to fully set into the fabric, ensuring a vibrant and long-lasting print on your garden flag. Rushing this step might affect the final result, so patience is key!
What is ghosting in sublimation?
Ghosting in sublimation refers to faint, unintended images or shadows that may appear on the final product. This can happen if there’s any movement or misalignment during the heat press stage. To avoid ghosting, make sure your sublimation paper is securely taped to the fabric, and the heat press is applied evenly and without disturbance.
Which way does a garden flag go?
Garden flags typically have a specific orientation, with the top side meant to be the one facing outward. The top is usually identified by the placement of the design, any text, or decorative elements. Additionally, the side with the pole sleeve (the pocket where the flagpole goes) is usually the top. Just remember, the most attractive side and the pole sleeve side are usually the same.
What is the most common outdoor flag size?
The most common outdoor flag size varies, but a standard size for garden flags is typically around 12 inches by 18 inches. Larger outdoor flags for residential use might be around 3 feet by 5 feet. Keep in mind that flag sizes can vary, and personal preferences play a role in choosing the right size for your outdoor space.
Wrapping Up: Making Your Garden Your Own
Quick Look Back
Wow, you’ve made it through our garden adventure! Let’s quickly remember what we’ve covered:
- Magic of Sublimation: We found out how sublimation turns regular flags into colorful, strong masterpieces.
- Tools in Your Kit: You got your hands on the special tools – printers, heat presses, and all – to make your garden dreams come true.
- Flag Designing Tricks: We shared secrets on choosing and designing flags that scream “you” and go perfectly with your garden.
- Step-by-Step Fun: You learned the steps, from getting the fabric ready to revealing your finished flag. Fun, right?
- Beyond Flags: Your garden is more than just flags. We explored cool ideas to add your personal touch all around.
- Show It Off: Finally, we talked about proudly displaying your creations in your garden.
Keep Being Creative!
As you keep playing with your garden, remember that it’s like a big, living art project. Every flower, every leaf, and every personalized flag tells a bit of your story. So, keep exploring, trying new things, and making your garden your very own masterpiece.
Your Garden, Your Style
Your garden isn’t just a bunch of plants – it’s your canvas. Don’t forget to sprinkle your unique style everywhere. Whether it’s quirky plant markers or colorful pots, let your personality bloom.
Cheers to DIY Beauty!
So, here’s to your garden flags, to the joy of getting your hands dirty, and to the endless beauty that comes with creating your own garden magic. Happy gardening, and may your garden always reflect the wonderful person you are!

I’m Nicholas Clark, the creative soul behind “Sublimes Print.” I’ve been bringing ideas to life with ink and paper, and I want you to be a part of it. At Sublimes Print, we’re all about making your prints a masterpiece. Join me in the creative journey at Sublimes Print, where every print tells a unique story!