Hey there, creative minds! If you’ve ever tried turning regular stuff into cool, personalized treasures using sublimation, you might know the struggle of dealing with those annoying heat tape marks.
Don’t worry—I’ve got your back with this guide. We’re going to uncover the secrets behind these marks and learn how to kick them out of your sublimation game.
If the tape is hard to remove, try warming it up with a heat gun or hairdryer to make it easier to pull off. Afterward, use a soft cloth and rubbing alcohol for any residue.
Understanding Heat Tape Marks
Let’s keep it simple. Heat tape marks are like leftover stains from the sublimation party, especially where you used heat-resistant tape to stick your design in place. They can mess up your masterpiece, making it look not-so-awesome.
What Are They and Why Do They Happen?
These marks show up when you’re trying to make things look super cool. The heat tape, which is supposed to be your ally in this creative adventure, sometimes leaves behind these weird stains. It happens, but we can fix it!
Where You Spot Them and Why It Matters
You’ll find these marks on different things you’ve jazzed up, like mugs or clothes. And guess what? They can make your awesome creation look not as awesome. Imagine working hard on a custom phone case, only to see these not-so-great marks. Not fun, right?
The Sublimation Troubleshooting Process
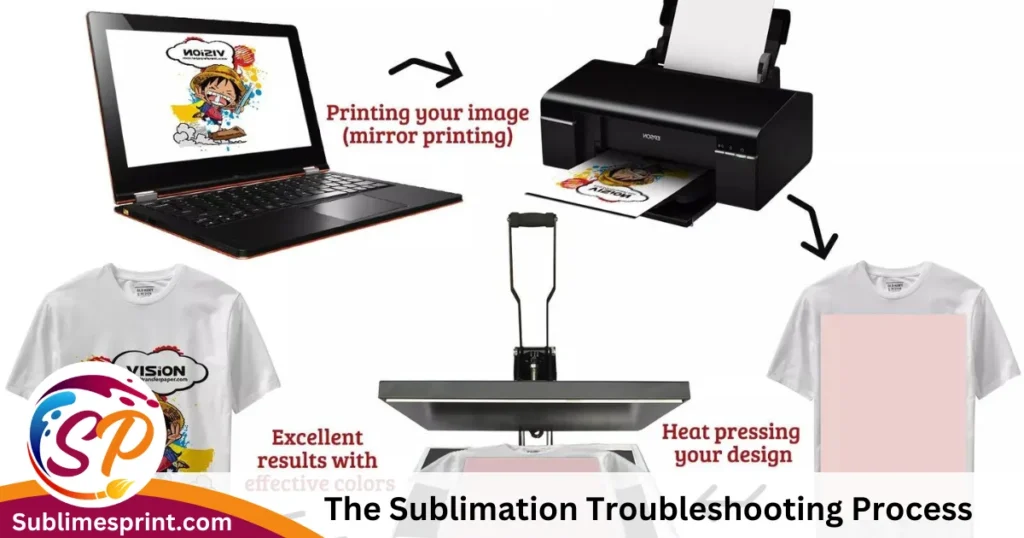
Before we get into erasing those heat tape marks, let’s talk about why troubleshooting is like your secret weapon in the world of sublimation.
Why Troubleshooting Is Cool
Think of troubleshooting as your superhero cape. It’s not about failing; it’s about leveling up your skills. When you face challenges, you get better at this whole sublimation thing.
Other Sublimation Challenges
Okay, heat tape marks might bug you, but there are other challenges too. Like, sometimes colors don’t behave, or prints end up looking a bit wonky. These challenges are like puzzles, and solving them makes you a sublimation superhero.
What’s the Deal with Heat Tape?
Now, let’s talk about that trusty sidekick, heat tape. It helps keep your design in place when things get hot. But, if you’re not careful, it can leave behind marks. It’s all about using it the right way.
Removing Heat Tape Marks: Your Sublimation Rescue Mission
Primary Techniques for Heat Tape Marks Removal
Alright, sublimation superheroes, it’s time to save the day and erase those pesky heat tape marks. Here’s your step-by-step guide to bring back the magic to your sublimated creations.
1.Gather Your Supplies
Before we jump into action, let’s assemble our superhero toolkit:
- Mild cleaning agent: Something gentle, like dish soap, works wonders.
- Soft cloth: You don’t want to scratch your awesome designs, so a gentle touch is key.
- Warm water: Lukewarm is perfect—no need for boiling water here!
2.Mix Your Cleaning Potion
Create a mix of your mild cleaning agent with warm water. Think of it as your secret potion to defeat those marks.
3.Dab, Don’t Rub
Dip your soft cloth into the cleaning potion, and gently dab the area with heat tape marks. Remember, we’re not scrubbing a pirate ship’s deck here—gentle is the name of the game.
4.Step Let it Soak
Allow your secret potion to work its magic. Let it soak for a bit, giving it time to break down those marks.
5. Wipe Away
After the soak, gently wipe away the marks with your soft cloth. It’s like wiping away the villains from your sublimation masterpiece.
6.Rinse and Pat Dry
To make sure there’s no residue left, rinse the cleaned area with clean water. Pat it dry with a soft cloth—no rough drying allowed.
Bonus Tips for Heat Tape Marks Prevention
Now that you’ve defeated the heat tape marks, let’s talk about keeping them at bay in the future. Prevention is the best superhero power.
Use Heat Tape Wisely
Apply heat tape carefully, ensuring it doesn’t overlap with your design. Think of it as creating a protective shield without letting it mess with your artwork.
Test, Test, Test
Before going all out on your grand creation, do a test run on a similar material. It’s like trying out your superhero gadgets before the big mission.
Clean Your Heat Press
Regularly clean your heat press. A clean press equals a cleaner, mark-free finish.Removing Heat Tape Marks: Your Sublimation Rescue Mission
Primary Techniques for Heat Tape Marks Removal
Alright, sublimation superheroes, it’s time to save the day and erase those pesky heat tape marks. Here’s your step-by-step guide to bring back the magic to your sublimated creations.
Gather Your Supplies
Before we jump into action, let’s assemble our superhero toolkit:
- Mild cleaning agent: Something gentle, like dish soap, works wonders.
- Soft cloth: You don’t want to scratch your awesome designs, so a gentle touch is key.
- Warm water: Lukewarm is perfect—no need for boiling water here!
Mix Your Cleaning Potion
Create a mix of your mild cleaning agent with warm water. Think of it as your secret potion to defeat those marks.
Dab, Don’t Rub
Dip your soft cloth into the cleaning potion, and gently dab the area with heat tape marks. Remember, we’re not scrubbing a pirate ship’s deck here—gentle is the name of the game.
Let it Soak
Allow your secret potion to work its magic. Let it soak for a bit, giving it time to break down those marks.
Wipe Away
After the soak, gently wipe away the marks with your soft cloth. It’s like wiping away the villains from your sublimation masterpiece.
Rinse and Pat Dry
To make sure there’s no residue left, rinse the cleaned area with clean water. Pat it dry with a soft cloth no rough drying allowed.
Secondary Tips for Enhanced Sublimation Prints
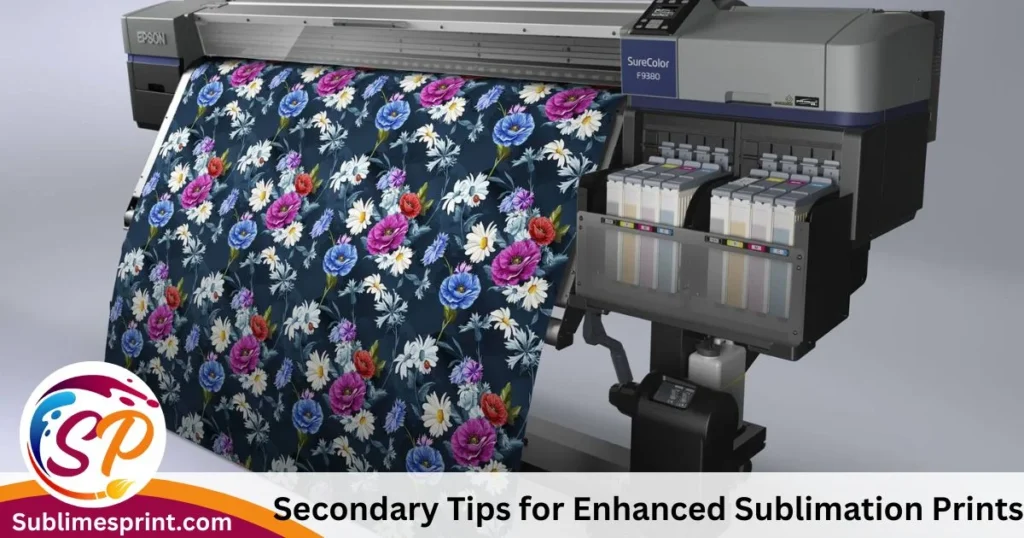
Fantastic job defeating those heat tape marks, sublimation superheroes! Now, let’s level up your sublimation game with some extra tips and tricks to make your prints truly extraordinary.
DIY Fixes for Sublimation Print Imperfections
Color Correction Hacks
Ever faced color inconsistencies in your prints? Fear not! You can tweak colors using graphic design software or adjust your sublimation settings. Experiment until you find the perfect shades for your creations.
Smooth Out Uneven Prints
If your prints end up a bit bumpy or uneven, try pre-pressing your substrate. This step helps eliminate wrinkles and ensures a smooth surface for your design.
Best Practices for Preventing and Addressing Common Sublimation Issues
Temperature and Time Calibration
Getting your temperature and timing just right is crucial. Invest time in calibrating your heat press settings and keep an eye on the clock. Consistency is key to achieving flawless sublimation results.
Perfecting Pressure
Adjusting the pressure on your heat press might sound like a minor detail, but it can make a world of difference. Experiment with different pressure settings to find the sweet spot for your specific materials.
Guidance on Achieving Professional-Quality Sublimated Items
Invest in High-Quality Blanks
The foundation of a great sublimated product is a high-quality blank. Choose substrates made for sublimation, and you’ll notice a significant improvement in the vibrancy and durability of your prints.
Finishing Touches Matter
After the heat press magic, pay attention to the finishing touches. Trim excess paper carefully, remove any leftover protective film, and inspect your creation for any imperfections before presenting it to the world.
Real-Life Success Stories and Case Studies

Now, let’s dive into the inspiring tales of fellow sublimation enthusiasts who faced challenges head-on and emerged victorious.
Showcase Examples of Sublimation Artists Overcoming Challenges
The Color Conundrum
Meet Alex, a passionate sublimation artist who struggled with color inconsistencies. By experimenting with different color profiles and adjusting temperature settings, Alex conquered the color conundrum and now produces vibrant, consistent prints.
The Wrinkle Warrior
Sarah, like many of us, faced issues with uneven prints. Her secret weapon? Pre-pressing her substrates to ensure a smooth canvas for her designs. Now, Sarah’s creations boast a flawless finish.
Read Also: What Canon Printers Can Be Used For Sublimation, Pixma MG-3620
Community-Driven Solutions and Insights
Share Your Wisdom
As we wrap up this guide, I encourage you to share your own tips and tricks in the comments. The sublimation community thrives on collective knowledge, and your insights could be the solution someone else is looking for.
Connect on Social Media
Join the conversation on social media platforms dedicated to sublimation enthusiasts. Share your success stories, seek advice, and celebrate the vibrant world of sublimation together.
Joining the Sublimation Squad: Let’s Learn and Create Together!
Great job on tackling those tricky heat tape marks, creative pals! Now, let’s talk about why being part of a team of sublimation enthusiasts is the coolest thing ever. We’ll also share some easy ways for you to connect with others, keep learning, and make your sublimation adventures even more awesome!
Sharing Your Super Stories
Hey, superhero artists! We want to hear about your adventures. In the comments, tell us about the cool stuff you’ve created, the challenges you’ve faced, and any tricks you’ve discovered. Your experiences might be just what someone needs to make their own creations shine!
Teaming Up with Sublimation Buddies

Hang Out Online
Did you know there are special places on the internet just for sublimation fans? Check out places like Reddit, forums, and groups on social media. It’s like having a secret hideout where you can share ideas, ask questions, and be part of a super creative gang.
Join Events (Online or In Your Town)
Keep an eye out for events and workshops about sublimation. You can attend these events either in person or online. It’s a chance to meet people who love sublimation as much as you do, learn cool new things, and feel the excitement of being part of a creative community.
Learning More Fun Stuff
Subscribe for Updates
Want to stay in the loop about the latest sublimation tricks? Subscribe to blogs, newsletters, and YouTube channels all about sublimation. You’ll get regular updates that will keep you in the know about new ideas and ways to make your creations even more awesome.
Take Cool Classes
Did you know you can take classes online to become a sublimation expert? Yep, it’s true! There are courses that teach you everything from the basics to super advanced techniques. It’s like having a sidekick to help you level up your sublimation skills.
FAQs
How to Prevent Scorch Marks When Sublimating?
Scorch marks can be a real bummer, right? Well, worry not! To prevent them, make sure your heat press is set to the right temperature for the material you’re using. Also, use protective sheets or parchment paper between your transfer and the heat platen. This superhero move creates a barrier, keeping scorch marks at bay and ensuring your prints come out looking fantastic!
Why Spray Peroxide on Sublimation?
Alright, imagine peroxide as your secret sidekick against stubborn stains. When you spray it on sublimated items, especially fabric, it helps lift and break down stains without fading your vibrant prints. Peroxide is like a gentle superhero, tackling stains without harming your creations. Just be sure to test it on a small, hidden area first to make sure it plays nicely with your materials.
How to Get Sticky Duct Tape Residue off Fabric
Sticky situations with duct tape residue on fabric? No worries! Here’s a simple solution: grab some cooking oil or rubbing alcohol. Apply a bit to the sticky area, let it sit for a few minutes, and then gently rub or wipe away the residue. It’s like a magic trick for saying goodbye to sticky messes without harming your fabric.
How to Heat Press Polyester Without Leaving Marks?
Polyester can be a bit sensitive, but fear not, sublimation hero! To heat press polyester without leaving marks, use a pressing pillow or a Teflon sheet. Place it inside your garment, and it acts like a barrier, preventing those pesky marks. This superhero move ensures your polyester items come out smooth and mark-free.
Does Vinegar Remove Tape Residue?
Yes, indeed! Vinegar is like a cleaning superhero. Mix it with warm water (about one part vinegar to two parts water), and use a cloth to gently rub away tape residue. Vinegar breaks down the stickiness, making it easier to wipe away. Plus, it’s a natural solution that won’t harm your surfaces. A superhero cleaning hack right in your kitchen!
Will Windex Remove Tape Residue?
Absolutely! Windex is like a superhero against tape residue. Spray a bit on the sticky area, let it sit for a moment, and then wipe it away with a cloth. It’s like magic—the residue disappears, and your surface is left shiny and clean. Just be sure to check if your surface is Windex-friendly before giving it the superhero treatment.
Does Hand Sanitizer Remove Tape Residue?
You bet! Hand sanitizer isn’t just for clean hands—it’s also a superhero against sticky situations. Squeeze a bit of hand sanitizer onto the tape residue, let it sit for a minute, and then wipe it away with a cloth. It’s like a quick and easy trick to say goodbye to that annoying stickiness. Plus, it leaves behind a nice, clean scent. Hand sanitizer to the rescue! 🦸♂️✨
Let’s Wrap It Up: Remembering Our Super Lessons
As we finish up this guide, let’s remember a few important things:
- Troubleshooting is Cool: When things get tricky, don’t worry. It’s just a chance to become a sublimation superhero by figuring things out.
- Bye-Bye Heat Tape Marks: You’ve learned how to say goodbye to those pesky heat tape marks and make your creations shine bright.
- Be a Sublimation Star: Explore DIY tricks and tips to make your sublimation game even more amazing.
- Join the Fun: Connect with other sublimation fans, share your stories, and keep learning together.

I’m James Wilson, the driving force behind “Sublimes Print.” I’ve been deep in the world of sublimation printing, bringing my expertise and hands-on experience to the table. With a robust background in the art of sublimation printing, I’m all about sharing insights, exploring industry innovations, and fostering a collective appreciation for the craft.
So, join me on this printing journey, where we dive into the intricacies of sublimation and celebrate the beauty it brings to the world of printing!