Let’s dive into the colorful world of sublimation printing! It’s a cool technique that many people are using for fun DIY projects and small businesses. Imagine being able to print your designs on things like mugs and T-shirts—it’s like magic for crafty folks!
- Invest in a high-quality sublimation printer.
- Regularly maintain your printer.
- Use top-notch sublimation ink.
- Sublimate on 100% polyester garments.
- Apply sublimation poly coating spray on fabrics.
- Print high-resolution images.
- Only use items labeled as ‘sublimation blanks’.
Sublimation colors’ vibrancy by using a higher and suitable heat press setting, ensuring proper dye sublimation for optimal results.
Crafting Dreams: How Sublimation Printing Changed DIY Forever
Sublimation printing is like a superhero for DIY lovers. It lets you turn your creative ideas into real, tangible things. Thanks to special inks and easy-to-use materials, people, just like Emma, are creating one-of-a-kind items that showcase their personality and style. It’s not just about crafting; it’s about making your mark on the things you love.
Small Biz Vibes: Sublimation Printing Takes the Stage
Guess what? Small businesses are also catching onto the sublimation trend. Imagine having a business like Emma’s, where you get to make and sell unique products. Sublimation printing isn’t just a crafting tool; it’s a game-changer for people who want to turn their passion into a little business venture. The best part? The results look super professional!
DIY Community: Where Everyone Can Play
What makes sublimation printing even cooler is that it’s for everyone. You don’t need to be a pro to try it out. It’s like a big crafty family online, with people sharing tips and cheering each other on. So, whether you’re a seasoned crafter or just starting, sublimation printing welcomes you with open arms.
Unveiling the Sublimation Printing Magic
Now that we’re on the sublimation printing train, let’s unpack the magic behind it. The sublimation printing process is like a secret code that turns ordinary things into vibrant, personalized masterpieces.
The Sublimation Dance: How It Works
Picture this: sublimation ink, the hero of our story, transforms into a gas when heated. This magical gas dives into the very fabric or surface of your chosen material. When it cools down, it becomes a part of that material, creating prints that won’t fade away easily. It’s like your designs become one with the item, making them durable and super cool.
Meet the Heroes: Sublimation Ink, Heat Press, and Sublimation Paper
Our heroes in this printing adventure are sublimation ink, the heat press, and sublimation paper. Sublimation ink is special—it’s designed to transform from a liquid to a gas and back again without missing a beat. The heat press is like the magic wand that brings our designs to life. It heats up to the perfect temperature, turning the ink into a gas and pressing it into the material. And then there’s sublimation paper, the trusty sidekick that holds the ink and keeps everything neat.
Color Profiles: The Architects of Vibrancy
Now, let’s talk about color profiles. Imagine them as the architects of your prints’ vibrancy. These profiles are like guides that tell your printer how to mix the inks to get the perfect colors. Using the right color profiles is key to achieving those eye-popping, vibrant prints. It’s like having a recipe for the most delicious colors that make your designs stand out.
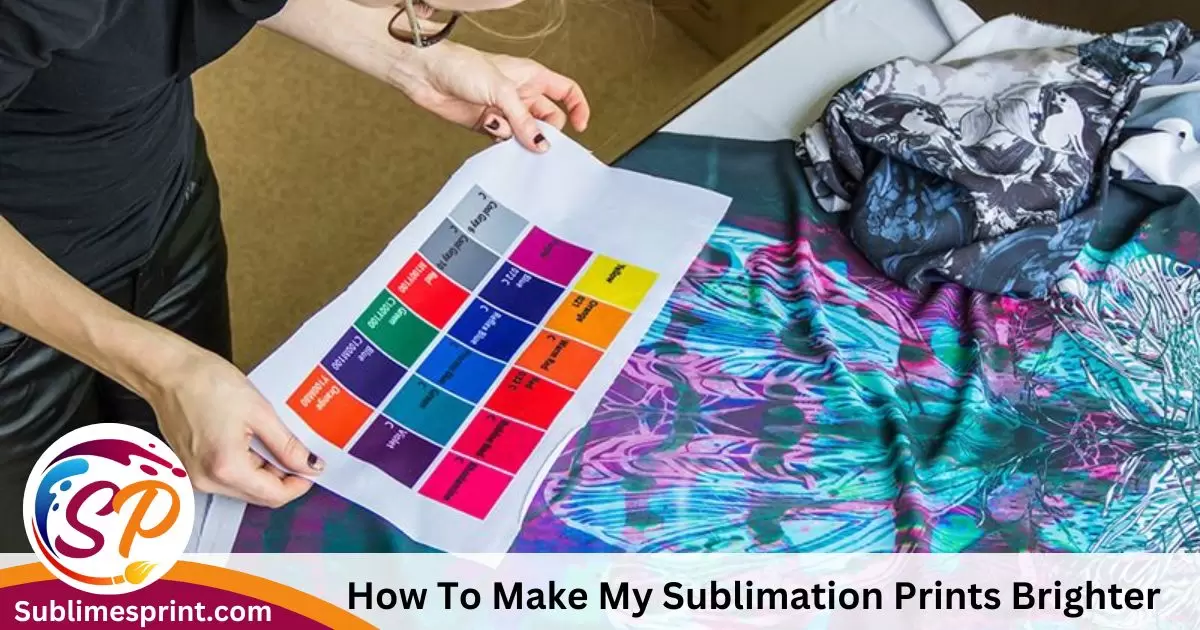
Assessing the Brilliance: Tips for Vibrant Sublimation Prints

Now that we’ve unraveled the secrets behind sublimation printing, let’s talk about how to assess the brilliance of your prints. Whether you’re a seasoned sublimation enthusiast like Emma or just starting out, evaluating the brightness and vibrancy of your creations is crucial.
Shine a Light on Your Prints: Easy Evaluation Tips
- Natural Lighting is Your Best Friend: Take a good look at your prints in natural light. Daylight is like a truth serum for colors—it reveals their true brilliance. Check your prints near a window or outside to see how they sparkle.
- Color Consistency Matters: Compare different parts of your print to ensure color consistency. No one likes surprises, especially when it comes to unexpected color variations. Make sure your designs look uniform across the entire surface.
- Inspect for Sharpness and Clarity: A vibrant print isn’t just about colors; it’s also about sharpness. Examine your prints for crisp details and clear lines. If your design has intricate elements, ensure they pop without any blurriness.
- Feel the Texture: Run your fingers over the printed surface. A well-done sublimation print should not only look good but also feel smooth. If the texture is off or uneven, it might be time to tweak your technique.
Common Challenges in the World of Sublimation Printing
Every sublimation enthusiast faces challenges along the way. Knowing the common stumbling blocks can help you navigate your printing journey more effectively.
- Color Inconsistencies: Sometimes, achieving consistent colors can be tricky. Your prints might have variations, making them look uneven. Understanding color profiles and experimenting with settings can help address this challenge.
- Ghosting and Blurring: Ghosting, where a faint image appears in unwanted areas, and blurring can dampen the brilliance of your prints. Adjusting your heat press settings and ensuring your sublimation paper is correctly aligned are crucial remedies.
- Substrate Issues: Different materials absorb colors in unique ways. If you’re printing on various substrates, each comes with its own set of challenges. Understanding the characteristics of your chosen material is key to overcoming substrate-related issues.
- Fading Over Time: No one wants prints that lose their vibrancy over time. Ensure you’re using high-quality sublimation ink and materials to create lasting, vivid prints.
Choosing Materials Wisely: Elevating Your Sublimation Game

Now that you’ve got a handle on assessing your prints, let’s talk about a crucial aspect of sublimation success—choosing the right materials. The journey to vibrant and lasting sublimation prints begins with two key players: sublimation paper and ink, and the selection of substrates that absorb colors like a canvas waiting for a masterpiece.
Investing in Quality: The Sublimation Paper and Ink Duo
- The Role of Sublimation Paper: Imagine sublimation paper as the canvas for your artwork. Using high-quality sublimation paper ensures that your ink is absorbed evenly, preventing smudging and maintaining the sharpness of your designs. Invest in paper that’s specifically designed for sublimation printing for optimal results.
- Sublimation Ink Quality Matters: The ink you choose is the color palette for your creations. Opt for high-quality sublimation ink that is compatible with your printer. Quality ink not only produces more vibrant colors but also plays a role in the longevity of your prints. Check for ink that is fade-resistant and capable of capturing fine details.
Substrate Selection: Where Your Designs Come to Life
- Understanding Substrates: Substrates are the materials you print your designs on—think T-shirts, mugs, or metal sheets. Each substrate behaves differently, affecting how colors are absorbed. Understanding the characteristics of your chosen substrates is crucial for achieving optimal color brilliance.
- Fabric Fantasia: When printing on fabric, choose materials that have a high polyester content. Polyester fabrics readily absorb sublimation ink, resulting in vivid prints with excellent color retention. The smoother the fabric, the better the ink transfer.
- Ceramics and Metals Magic: For ceramics and metals, look for substrates with a special sublimation coating. These coatings enhance color absorption and adhesion, ensuring that your prints look stunning and resist fading over time. Make sure the surface is clean and free from any contaminants before printing.
- Beyond the Basics: Diversifying Sublimation Materials: Don’t limit yourself to the basics. Experiment with different substrates like wood, glass, or even phone cases. Each material brings its own charm to your designs, offering endless possibilities for creating unique, eye-catching products.
Unlocking Vibrancy: Getting Your Heat Press Right
Alright, now let’s make sure our prints come out looking amazing by optimizing our heat press settings. Think of the heat press like a chef’s oven—it needs to be just right to cook up those vibrant colors on your designs.
Perfecting the Temperature and Pressure Dance
- Temperature Trick: Imagine the right temperature as the secret ingredient. Set your heat press to the temperature recommended for your ink and material. Too hot or too cold can mess up your prints, so find that Goldilocks spot that’s just right.
- Pressure Power: Adjust the pressure based on how thick your material is. Too much pressure can squish your image, while too little might not transfer the ink well. Experiment with different pressures until you find the sweet spot.
- Timing Matters: How long you press is just as crucial. Different materials need different press times. Too short, and the colors might not stick; too long, and you might end up with weird color changes. It’s all about finding that perfect timing.
Color Saturation: Time and Temperature Tag Team
Time and Temperature Connection:
Time and temperature go hand in hand. Higher temperatures often mean shorter press times, and lower temperatures may need longer times. It’s a bit like finding the right combo for your favorite video game.
Avoiding Color Surprises:
Be careful of color changes if your heat press is too hot or the press time is too long. You want your colors to pop, not surprise you with unexpected shifts. Play around with settings until your colors saturate your material just right.
Color Magic: Making Your Prints Pop
Now that our heat press is all set, let’s talk about making your colors look incredible. It’s time to unleash the color wizard in you and correct those hues to match your creative vision.
Easy Tricks for Fixing Colors
- Check Your Screen: Make sure your computer screen shows colors accurately. Think of it like checking your ingredients before cooking. Calibration tools can help you get consistent colors on your screen and in your prints.
- Start with Neutral Colors: Imagine your design as a canvas. Starting with neutral colors creates a solid base. It’s like laying the groundwork before you add those pops of color.
- Test Prints Are Like Tasting: Before you commit to a big print, do some test runs. It’s like tasting your dish before serving it to guests. Adjust and fine-tune until your colors are just right.
- Color Correction Tools Are Your Friends: Invest in tools that let you play with colors. It’s like having a magic wand for your hues. These tools help you tweak specific colors and make your prints match your creative vision.
Color Profiles: Your Prints’ Travel Guides
- What’s a Color Profile: Color profiles are like guides that make sure your prints look the same on different devices. Choosing the right one ensures your colors stay true from screen to print.
- Pick the Right Profile: Select a color profile that matches your printer, ink, and material. This ensures your prints look just like what you see on your screen. It’s like making sure your dish tastes the same every time you cook it.
- Keep It Consistent: Stick to the same color profile each time you print. Consistency is key. It’s like using the same recipe to make sure your prints always turn out the way you want.
Read Also: Can You Wash Sublimation Shirts Right Away?
Designing Brilliance: Bringing Colors to Life with Software
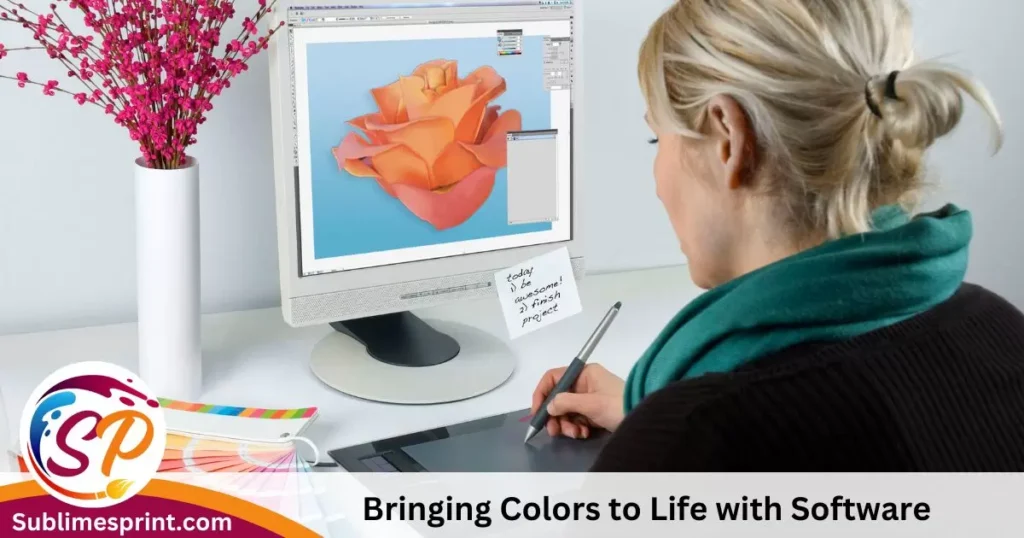
Now that we’ve mastered the basics, let’s talk about making your prints even more eye-catching by diving into design software. It’s like adding special ingredients to your dish to make it truly stand out.
Harnessing Software Magic for Vibrant Colors
- Choosing the Right Software: Think of design software as your artist’s palette. Choose user-friendly software that allows you to play with colors effortlessly. Adobe Creative Cloud, CorelDRAW, or even free options like GIMP can be your creative playground.
- Enhancing Colors Digitally: Once you’ve got your design ready, use the software to enhance colors. Adjust the saturation and contrast to make your colors pop. It’s like turning up the volume on your favorite song for that extra oomph.
Graphic Design Techniques: Turning Prints into Visual Marvels
- Layering for Depth: Imagine your design as a painting. Use layers to add depth to your prints. It’s like creating a 3D effect that makes your designs more visually interesting.
- Contrast is Key: Playing with contrast is like adding spices to your dish. Make certain elements stand out by adjusting the brightness and darkness of different areas in your design.
- Typography Tricks: If your prints involve text, experiment with typography. Try different fonts, sizes, and arrangements to make your words not just readable but visually engaging. It’s like choosing the perfect font to match the vibe of your design.
- Experimenting with Patterns and Textures: Don’t be afraid to throw in some patterns or textures. It’s like adding unique flavors to your dish. This can make your prints tactile and visually intriguing.
Now that we’ve adorned our designs with digital flair, let’s tackle the final leg of our journey—addressing common issues that might pop up during the printing process.
Troubleshooting Wizardry: Navigating Common Printing Hiccups
No journey is complete without a few bumps along the way. Let’s talk about troubleshooting common issues during sublimation printing. It’s like being a wizard who can fix things with a flick of the wand.
Common Problems and Solutions: Taming the Printing Dragons
- Color Bleeding Woes: If your colors are bleeding into each other, it’s time to check your heat press settings. Adjust the temperature and pressure to ensure colors stay where they should. Think of it as putting up barriers to keep each color in its own space.
- Uneven Prints Distress: Uneven prints can be a headache. Make sure your heat press is applying consistent pressure across the entire design. If needed, place a Teflon sheet or use heat-resistant tape to ensure even distribution.
- Ghosting Nightmares: Ghosting, where faint images appear unexpectedly, can be spooky. To banish these ghosts, make sure your heat press is opening smoothly, without any jerks. Also, check if your substrate is clean and free from debris.
- Consistency Conundrum: If achieving consistent colors feels like a puzzle, revisit your color profiles. Using the right profile ensures that your prints maintain a consistent look. It’s like having a map that guides you to the same destination every time.
- Bright and Beautiful Goals: To ensure consistently bright prints, regularly check your sublimation paper and ink quality. Using high-quality materials is like using the best ingredients for your dish—it ensures a delicious result every time.
Opening New Doors: Trying Fun Stuff with Sublimation
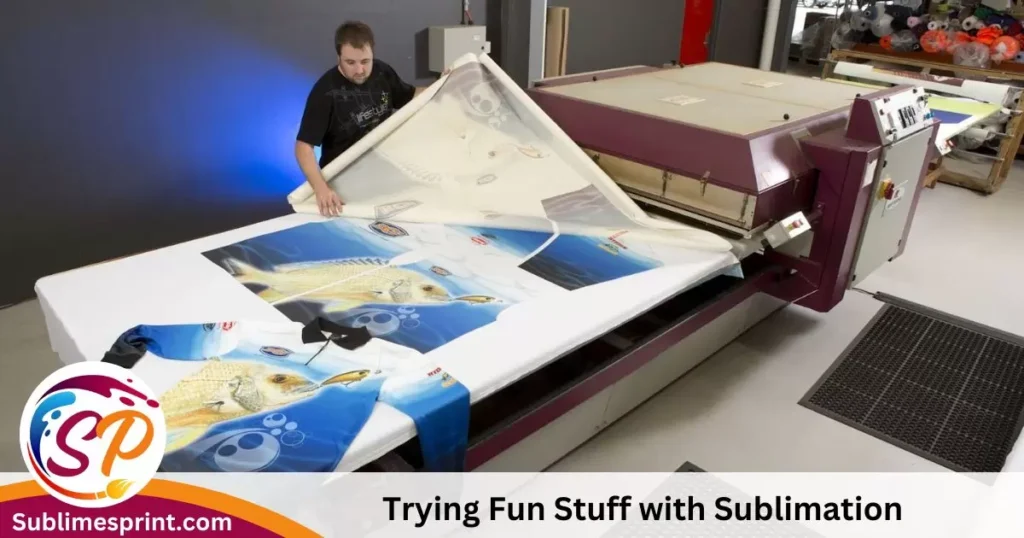
So, now that you’re a pro at sublimation, let’s talk about trying out different things with your prints. It’s like adding cool ingredients to your recipe, creating lots of new options for your artistic projects.
Checking Out New Materials: More Than Just Paper
Awesome Fabrics: Clothes are great for sublimation! Try printing on polyester fabrics like T-shirts or pillowcases. They give your prints a smooth look and feel. It’s like painting on a new kind of canvas.
Ceramic Wonders: Ceramics, like mugs and plates, can be your new art canvas. They have a special coating that makes your prints look fantastic. Imagine having your colorful designs on your morning coffee mug—pretty cool, right?
Metal Magic: Metals are not just for machines; they can be great for sublimation too. Aluminum sheets or keychains are cool surfaces for your prints. The shiny metal adds a special touch. It’s like turning everyday things into shiny masterpieces.
Fun DIY Ideas: Making Cool Stuff Yourself
Custom Clothes:
Turn plain clothes into your unique fashion statement. Print your designs on plain white T-shirts or caps. You get to wear your own vibrant art—it’s like having a walking gallery!
Home Decor Fun:
Make your home look awesome with personalized decor. Print colorful designs on throw pillows, blankets, or even wall hangings. Your home becomes your personal art gallery.
Accessories Extravaganza:
Step up your accessory game. Design custom phone cases, keychains, or even sneakers. It’s like turning ordinary things into wearable art pieces that show off your style.
Now that you’ve tried some cool projects, let’s talk about how to share them with the world.
Showing Off Your Cool Prints: Let’s Talk About It
Your prints are amazing, and people should know about them! Let’s chat about how to tell everyone and share tips for taking awesome pictures of your products.
Getting People Interested: Share Your Story
Tell Your Tale: Your prints have a story—share it! Whether it’s how you got the idea or what inspired you, people love hearing about the person behind the art. Share your story on your website, social media, or even on little tags with your products.
Make Your Brand Look Cool: Make everything about your brand look awesome. From your logo to how you wrap your products, let it all show off the vibrant and unique style of your prints. When people see consistency, they remember you.
Use Social Media: Social media is like a big stage for your creations. Share cool pictures, behind-the-scenes stuff, and talk to your audience. Platforms like Instagram and Pinterest are great for showing off your visual story.
Picture Tips: Making Your Colors Pop in Photos
Sunlight Magic: Use natural light when taking pictures—it makes your colors look real good. Set up near a window or go outside for that extra pop of vibrancy.
Show Off Details: Zoom in on your prints to highlight the details. Let people see the sharpness and cool parts of your designs. Show them the craft behind each print.
Mix It Up: Display all the cool stuff you make. Show different products and materials. It helps people see how your prints can be a part of their lives.
Get Customers Involved: Ask your customers to share pictures of your stuff in use. It makes your brand more real, and people love seeing how others use your vibrant creations.
FAQs
Why is my black sublimation not dark?
If your black sublimation is not appearing dark, it could be due to a few reasons. Firstly, check if your printer settings are optimized for sublimation. Also, make sure you are using a true black in your design. Adjust the color settings and ensure your substrate (the material you’re printing on) is compatible with sublimation.
How can I improve my print color?
To enhance your print color, start by using high-quality sublimation inks. Ensure your design file is in a high-resolution format. Calibrate your printer regularly, and choose the right color profile for your sublimation process. Experiment with different color settings to find the optimal combination for vibrant prints.
How do I make my CMYK print brighter?
To make your CMYK prints brighter, focus on adjusting the color saturation and contrast in your design software. Optimize your file resolution and choose a glossy substrate for better color reflection. Additionally, make sure your printer settings are configured for optimal color output.
What color mode is best for sublimation?
The best color mode for sublimation is often RGB (Red, Green, Blue). Sublimation printers are designed to interpret RGB colors more accurately. Convert your designs to RGB mode before printing to ensure the colors translate well during the sublimation process.
What is the best format for sublimation printing?
For sublimation printing, it’s recommended to use high-resolution raster images in formats like PNG or TIFF. These formats preserve the details and clarity of your design. Ensure your images have a minimum of 300 DPI (dots per inch) for the best print quality.
Closing Thoughts: Making Your Prints Awesome
Alright, we’re at the end of our sublimation journey, and it’s time for a quick summary. Think of it like the last chapter of a great book—we’re wrapping up the key things to make your prints super cool.
Quick Recap: How to Make Your Prints Shine
Smart Material Choices: Use good sublimation paper and ink. Pick materials that love your designs, so your colors come out looking fantastic.
Heat Press Mastery: Tweak your heat press settings like a pro. Get the temperature, pressure, and time just right to make sure your colors pop perfectly.
Color Magic: Learn the tricks of color correction. Calibrate your monitor, start with neutral colors, and use cool tools. Oh, and pick the right color profile—it’s like a GPS for your colors.
Software Adventures: Play around with design software to add that extra flair. Make your colors shine and turn your prints into visual masterpieces.
Cool Projects: Try out different materials for your prints—fabrics, ceramics, metals. And don’t forget to have fun with cool DIY projects. It’s like turning everyday things into your own art canvas.
Sharing the Love: Tell your story, create a cool brand look, and show off your prints on social media. And when you’re taking pictures, focus on details, mix it up, and get your customers involved.
Last Words: Your Unique Journey
As you go forward, remember that your sublimation journey is all about trying new things and finding your own style. Every print is a chance to express yourself and turn your ideas into something vibrant.

I’m Nicholas Clark, the creative soul behind “Sublimes Print.” I’ve been bringing ideas to life with ink and paper, and I want you to be a part of it. At Sublimes Print, we’re all about making your prints a masterpiece. Join me in the creative journey at Sublimes Print, where every print tells a unique story!