Hey there, crafty pals! Ever wondered how to turn plain old burlap into a canvas for your wildest creative ideas? Sublimate on burlap. Well, get ready for a fun ride as we explore the magic of making cool stuff with sublimation on burlap.
What’s that, you ask? Sublimation is like printing magic that lets you add super colorful designs to things. And burlap? It’s a rough and tough fabric that’s perfect for adding a cozy touch to your home.
So, why should you care? Because we’re about to discover how this dream team – burlap and sublimation – can bring your DIY dreams to life.
Can you sublimate on burlap? You have the option to print using sublimation on burlap. Burlap’s rough texture and strong quality make it a great surface for sublimation printing.
Get ready to jazz up your space with personalized creations that shout, “I made this!” It’s time to unleash your inner artist, and I’m here to guide you every step of the way. Let’s make crafting history together!
Getting Started: Tools and Materials
Essential Tools for Sublimating on Burlap
Alright, my creative buddies, let’s kick things off by gathering the tools you need to turn plain burlap into your personalized masterpiece. No worries, you don’t need a fancy workshop – just a few key items will do the trick.
Sublimation Printer and Inks
First things first, you’ll need a special printer that plays nice with sublimation inks. These inks are like the superheroes of printing because they can turn into a gas and dive deep into materials, like burlap, leaving behind vibrant colors.
Burlap Fabric
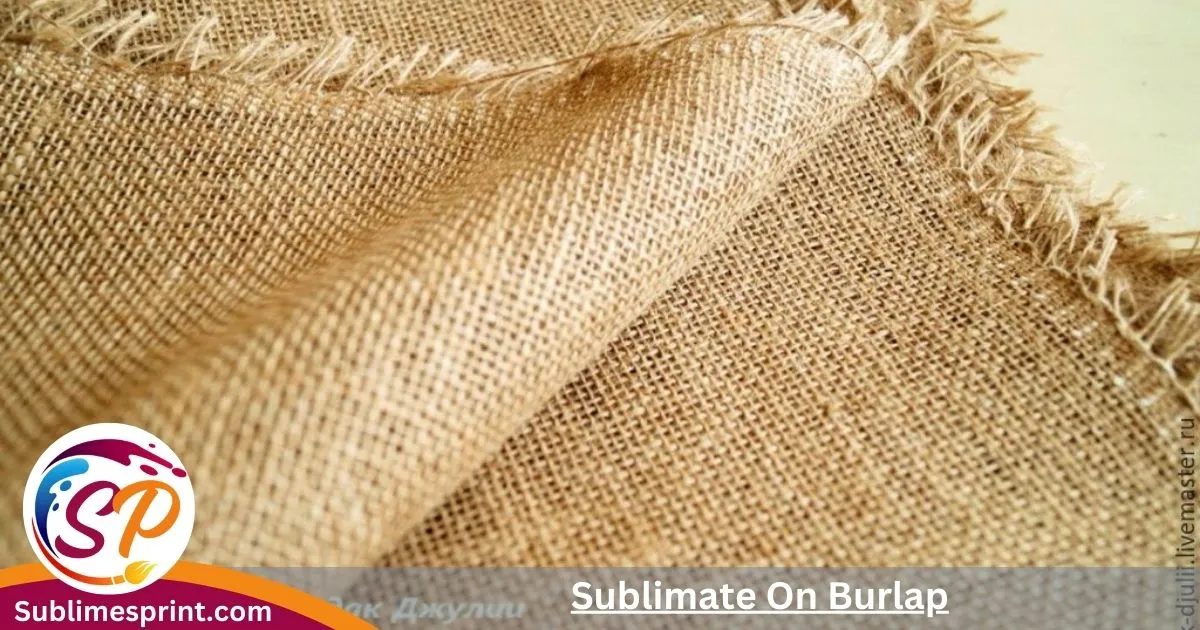
Grab a piece of burlap, and make sure it’s the right kind. The open weave of burlap makes it a perfect match for sublimation. You can find it at craft stores, and it usually comes in rolls or sheets.
Heat Press
Meet your crafting buddy, the heat press! This magical machine will help your sublimation inks stick to the burlap. It’s like giving your creation a big, warm hug to make everything stay put.
Recommended Burlap Types for Crafting
Not all burlaps are created equal. Some are smooth, and others are a bit rough around the edges. Choose the type that fits your project vibe.
Medium-Weight Burlap
Perfect for wall hangings and decor projects. It’s not too thick or too thin – just right for showing off your designs.
Fine-Weave Burlap
If you’re into detailed designs, this one’s for you. The fine weave allows for intricate prints, ideal for smaller crafts like personalized gift bags.
Colored Burlap
Feeling bold? Explore burlap in different colors for an extra pop. Remember, lighter colors work best for vibrant sublimation prints.
Now that you’ve got your tools and materials ready, we’re one step closer to transforming that burlap into a personalized masterpiece. Let’s dive into the world of DIY burlap sublimation projects!
DIY Burlap Sublimation Projects
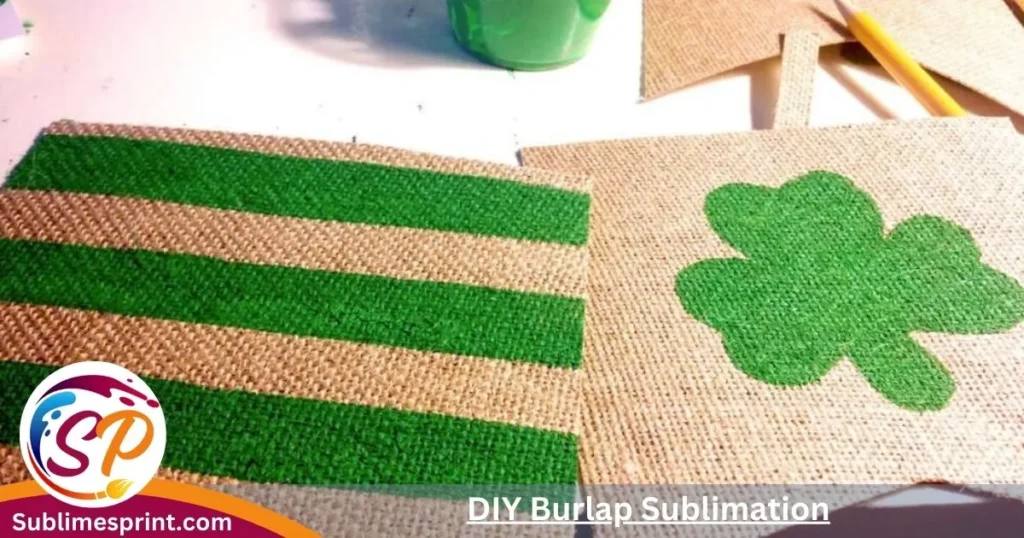
Personalized Burlap Wall Art
Let’s start this creative journey by turning your plain walls into a gallery of personalized masterpieces. With sublimation on burlap, you can create unique wall art that reflects your style.
Step-by-Step Guide: Creating a Customized Burlap Wall Hanging
Select Your Design: Choose a design that speaks to you. It could be a favorite quote, a nature-inspired pattern, or even a photo you love.
Print It Out: Use your sublimation printer to bring your chosen design to life on a sheet of sublimation paper. The colors will look a bit dull at this stage, but don’t worry – the magic happens later.
Prep Your Burlap: Cut your burlap fabric to the desired size, making sure it fits your design. Give it a quick iron if there are any wrinkles.
Heat Press Magic: Place your burlap and sublimation paper in the heat press. Close the lid, and let the heat work its magic. The sublimation inks will turn into a gas, infusing your design into the burlap fibers.
Admire Your Creation: Open the heat press, peel away the paper, and voilà! Your once dull design is now a burst of vibrant colors on burlap. Let it cool, then hang it up to add a personal touch to your space.
Handmade Burlap Home Decor
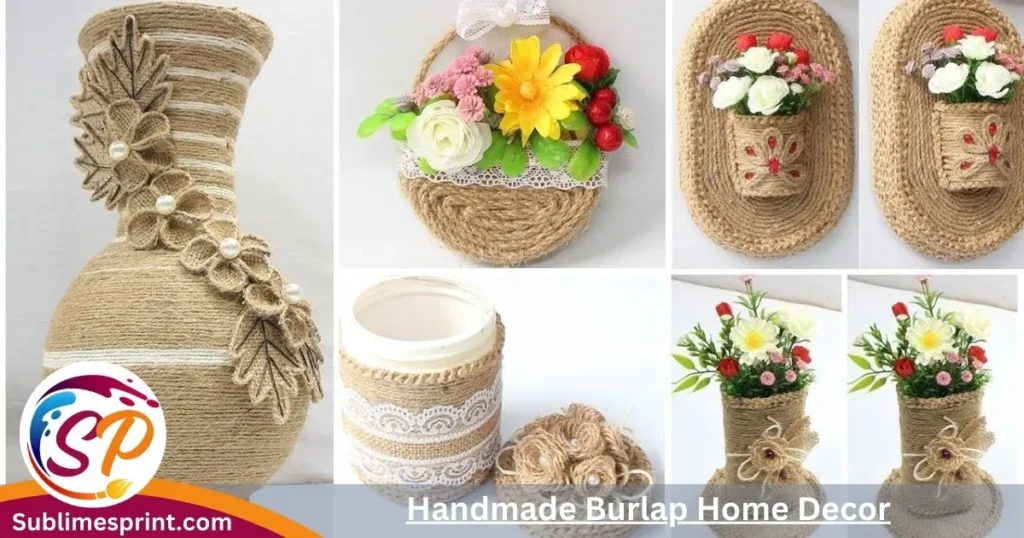
Now that your walls are looking fab, let’s explore other DIY burlap projects to spruce up your living space.
Crafting Unique Burlap Pillow Covers
Choose Your Style: Decide on the style you want for your pillows. Whether it’s a cozy farmhouse vibe or a modern look, burlap can adapt to any style.
Measure and Cut: Measure your pillows and cut the burlap accordingly, leaving some extra fabric for seams.
Print and Press: Print your chosen designs on sublimation paper and press them onto the burlap. Feel free to get creative with patterns or keep it simple with a single image.
Sew it Up: Once the designs are set, sew the burlap into pillow covers. If you’re not a sewing whiz, no worries – burlap’s rustic charm embraces imperfections.
Adorn Your Sofa: Place your handmade burlap pillow covers on your sofa for an instant style upgrade. Your guests will be asking, “Where did you get those?”
Read Also: Which Sentence Describes An Example Of Sublimation?
Creative Burlap Accessories
Burlap isn’t just for walls and sofas – it can also jazz up your accessories. Let’s explore making personalized burlap tote bags for a touch of eco-friendly fashion.
Customized Burlap Tote Bags
Pick Your Bag: Get a plain burlap tote bag as your canvas. These are readily available at craft stores or online.
Design and Print: Think about the design you want on your tote. It could be your favorite saying, a funky pattern, or even a snapshot of your pet. Print it out on sublimation paper.
Press and Go: Place your burlap bag and sublimation paper in the heat press. Let the heat work its magic again, transforming your design into a permanent part of the bag.
Show it Off: Strut your stuff with your personalized burlap tote. It’s not just a bag; it’s a statement piece that shows off your unique style.
These are just a few ideas to get your creative juices flowing. With sublimation on burlap, the possibilities are endless. Next up, we’ll explore some key techniques to ensure your burlap projects turn out picture-perfect.
Burlap Crafting Techniques

Step-by-Step Guide to Sublimating on Burlap
Now that you’ve got your hands dirty with some awesome burlap projects, let’s dive into the nitty-gritty of sublimating on burlap. Follow these steps, and your creations will be the talk of the crafting town.
Design Selection
Choose a design that suits your project. Whether it’s a bold pattern or a delicate image, make sure it speaks to your artistic vision.
Sublimation Printing
Print your chosen design onto sublimation paper using a compatible printer. This is where your creativity takes shape on paper.
Prepping the Burlap
Cut your burlap to the desired size and shape for your project. Ensure it’s clean and free of any loose fibers that might mess with your print.
Heat Press Setup
Preheat your heat press to the recommended temperature for sublimation on burlap. This step is crucial for a successful transfer.
Positioning the Design
Place your sublimation paper with the design facing down onto the burlap. Adjust the positioning to get it just right.
Pressing Time
Close the heat press and let it work its magic for the specified time. The heat activates the sublimation inks, transferring the design onto the burlap.
Cooling Off
Once the timer beeps, carefully open the heat press. Peel away the sublimation paper, and let your creation cool. Admire the vibrant design that’s now part of the burlap fibers.
Finishing Touches
Give your sublimated burlap project some time to cool completely. If it’s a fabric item like a pillow cover, you might want to wash it gently to remove any lingering sublimation residue.
Seal the Deal
Consider using a fabric sealant to protect your sublimated design, ensuring it stays vibrant even after multiple washes.
And there you have it – a personalized, sublimated burlap creation ready to take center stage in your home. Don’t hesitate to experiment with different designs and burlap types to find what suits your style best. Next, we’ll explore some tips and tricks to make your burlap sublimation projects even more spectacular.
Tips for Spectacular Burlap Sublimation Results
Getting the Best Out of Your Burlap Creations
Creating stunning sublimated burlap projects is an art, and every artist needs a few tricks up their sleeve. Here are some tips to ensure your burlap crafts turn out not just good, but spectacular.
Test, Test, Test
Before diving into your main project, do a test run on a small piece of burlap. This helps you adjust settings, ensure proper color transfer, and avoid any surprises.
Optimal Temperature and Time
Pay close attention to the recommended temperature and pressing time for sublimation on burlap. Following these guidelines ensures the inks properly infuse into the fabric.
Vibrant Colors Need Light Fabric
If you’re aiming for vibrant colors, choose lighter-colored burlap. The natural hue of burlap can influence how your sublimation colors appear.
Embrace the Texture
Burlap’s texture is part of its charm. Consider designs that work well with the natural weave, and don’t be afraid to let some of the texture show through for added character.
Mind the Bleed
Understand that sublimation inks can spread a bit during the transfer process. Keep this in mind when selecting or creating your designs to avoid unexpected bleeding.
Seal the Deal with Fabric Sealant
To ensure your hard work lasts, consider using a fabric sealant. It adds a protective layer, making your sublimated design more resistant to wear and tear.
Work in a Well-Ventilated Area
Sublimation involves heat and ink, so it’s best to work in a well-ventilated space. Proper ventilation helps disperse any fumes and ensures a safer crafting environment.
Cleanliness is Key
Before starting, make sure your burlap is clean and free of loose fibers. This helps achieve a crisp and clear sublimation transfer.
Mix and Match Burlap Types
Experiment with different types of burlap for various projects. Medium-weight burlap may be perfect for wall art, while fine-weave burlap suits detailed designs.
Get Creative with Patterns
Don’t limit yourself to simple designs. Explore intricate patterns, gradients, and even photo prints to push the boundaries of burlap sublimation.
With these tips in your crafting toolkit, you’re ready to elevate your sublimated burlap projects to a whole new level. Now, let’s explore how you can integrate these personalized creations into your home improvement endeavors.
Personalization and Home Improvement with Burlap Crafts
Adding a Touch of You to Your Living Space
Now that you’ve mastered the art of sublimating on burlap, it’s time to explore how these personalized creations can become the stars of your home improvement projects. Let’s dive into the wonderful world of integrating burlap crafts into your living space.
Gallery of Memories: Burlap Wall Art
Transform your plain walls into a gallery of memories with personalized burlap wall art. Whether it’s a family photo, a favorite quote, or a nature-inspired design, these pieces add a touch of warmth and personality to any room.
Cozy Comfort: Burlap Pillow Covers
Upgrade your sofa or bed with handmade burlap pillow covers. Mix and match designs to create a cozy atmosphere that reflects your unique style. It’s not just about comfort; it’s about making a statement.
Earthy Elegance: Burlap Table Runners
For a rustic yet elegant touch to your dining table, consider sublimated burlap table runners. They add texture and charm, making your meals feel like special occasions every day.
Fashionable Functionality: Burlap Tote Bags
Take your eco-friendly fashion game up a notch with personalized burlap tote bags. Perfect for grocery runs, outings, or even as a statement accessory, these totes showcase your creativity wherever you go.
Seasonal Switch-Ups: Burlap Banners
Celebrate seasons and special occasions with sublimated burlap banners. From birthdays to holidays, these banners add a personalized flair to your home’s festive decor.
Functional Art: Customized Home Accessories
Think beyond the traditional. Sublimated burlap can breathe new life into various accessories like placemats, coasters, and even lampshades. It’s about turning the functional into the fabulous.
Thoughtful Gifts: Handcrafted Burlap Creations
Spread the joy of personalized burlap by crafting thoughtful gifts for your loved ones. A custom tote bag, a framed wall art piece, or a set of burlap coasters – the possibilities are endless.
By incorporating these burlap creations into your home, you not only infuse your living space with a personal touch but also showcase your crafting prowess. Each item tells a story, making your home uniquely yours. Stay tuned as we explore some amazing DIY personalized burlap gift ideas in our next section!
Showcase: DIY Personalized Burlap Gifts
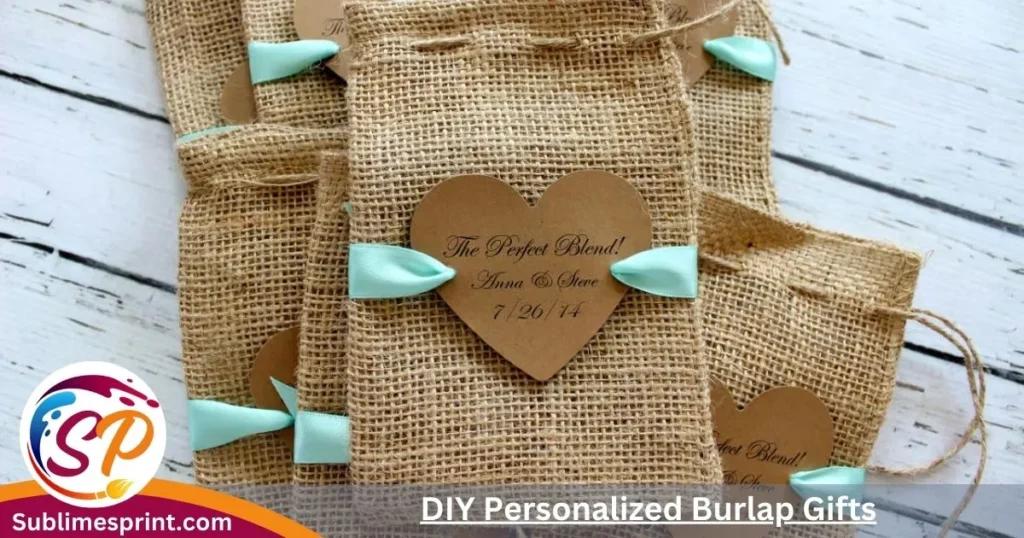
Crafting Meaningful Gifts Straight from the Heart
What’s more special than a gift that says, “I made this just for you”? Dive into the world of personalized burlap gifts and discover how you can create meaningful and memorable presents for your loved ones.
Sentimental Wall Art: Framed Burlap Prints
Capture cherished moments or meaningful quotes on burlap to create sentimental wall art. Frame it, and you’ve got a heartfelt gift that adds a personal touch to any space.
Cozy Comfort: Personalized Burlap Blankets
Turn a plain burlap blanket into a cozy masterpiece by adding personalized designs. It’s a warm and thoughtful gift, perfect for snuggling up with cherished memories.
Sip in Style: Sublimated Burlap Coasters
Craft burlap coasters with unique designs to protect surfaces in style. These make for great gifts, especially when paired with a set of mugs or a favorite beverage.
Tote-ally Awesome: Customized Burlap Tote Bags
Gift a one-of-a-kind burlap tote bag featuring a design that resonates with the recipient. It’s practical, stylish, and a constant reminder of your thoughtful gesture.
Photo Album Upgrade: Burlap Scrapbook Covers
Transform a regular photo album into a work of art by crafting personalized burlap covers. Add sublimated designs that reflect the memories captured inside.
Key to the Heart: Sublimated Burlap Keychains
Create mini masterpieces with burlap keychains featuring custom designs. It’s a small yet meaningful gift that adds a personal touch to everyday items.
Seasonal Delights: Personalized Burlap Ornaments
For special occasions or holidays, design burlap ornaments with personalized touches. They make for wonderful keepsakes that can be cherished for years to come.
Nature-Inspired Gifts: Sublimated Burlap Plant Holders
Craft burlap plant holders with vibrant designs for the green thumbs in your life. It’s a unique and decorative way to display their favorite plants.
Personalized Home Fragrance: Burlap Sachets
Infuse burlap sachets with custom scents and designs. These make for delightful and personalized additions to closets, drawers, or even as car fresheners.
Calendar of Memories: Burlap Photo Calendar
Create a personalized burlap calendar featuring memorable photos for each month. It’s a practical yet sentimental gift that brightens up any desk or wall.
These DIY burlap gifts go beyond the ordinary, letting you express your creativity while creating lasting memories for your friends and family. Get ready to be the gifting hero with these personalized and thoughtful creations!
People also ask
Can you sublimate on burlap?
- Yes, you can! Sublimation on burlap is a cool way to add colorful designs to this rough and tough fabric.
What temperature do you sublimate burlap?
- To work the magic, set your heat press to around 375°F (190°C). This temperature helps the special inks turn into gas and fuse with the burlap, creating vibrant designs.
What materials can you not sublimate on?
- Not everything loves the sublimation heat. Avoid materials like cotton because they don’t play well with the process. Stick to polyester, burlap, and other sublimation-friendly buddies.
Can you print on burlap?
- Absolutely! You can print your designs on burlap using a special printer and sublimation inks. This turns your plain burlap into a canvas for your creative ideas.
So, go ahead, heat up that press, and let the sublimation fun begin!
conclusion
Hey there, crafty pals! 🌟 We’ve journeyed through the world of sublimating on burlap, unlocking a treasure trove of DIY possibilities. Now, armed with knowledge about tools, techniques, and nifty tips, you’re ready to embark on your own crafting adventure.
Whether you’re jazzing up your living space with burlap wall art, crafting cozy pillow covers, or spreading joy with personalized gifts, remember – this is your chance to let your creativity shine! So, grab your burlap, fire up that sublimation printer, and let the crafting magic begin.
Each burlap creation tells a story, adding a personal touch to your home or making a thoughtful gift for someone special. It’s not just about crafting; it’s about creating moments and memories. So, go ahead – sublimate, create, and make your mark on the world of burlap crafting. Happy crafting, my creative friends!

I’m James Wilson, the driving force behind “Sublimes Print.” I’ve been deep in the world of sublimation printing, bringing my expertise and hands-on experience to the table. With a robust background in the art of sublimation printing, I’m all about sharing insights, exploring industry innovations, and fostering a collective appreciation for the craft.
So, join me on this printing journey, where we dive into the intricacies of sublimation and celebrate the beauty it brings to the world of printing!
