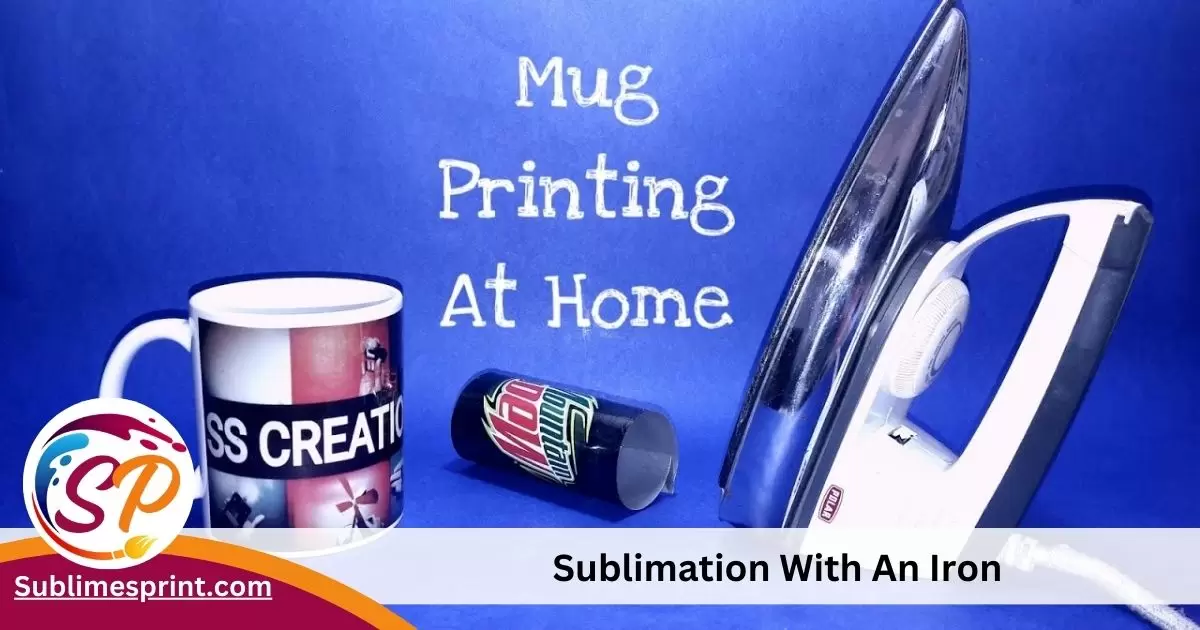
Sublimation with an Iron? While it’s technically possible to use an iron for sublimation, it’s not recommended. Sublimation demands precise control of temperature, pressure, and time, factors irons are not designed to handle effectively.
you can substitute an iron for a heat press when applying heat transfer vinyl. While heat presses are quicker and more convenient, you can still achieve good results with a household iron if you follow the instructions carefully.
Yes, you can use an iron for sublimation, as most irons can reach temperatures up to 400°F.
Discover the Iron Magic
You might be wondering, “What’s sublimation, and why an iron?” Sublimation is like the secret sauce of crafting – it’s a process where your designs go from “meh” to “wow” by using heat. Traditionally, folks use a heat press for this wizardry, but not everyone has that luxury. That’s where the iron swoops in, our hero for today.
Why the Iron Works Wonders?
Think of the iron as your crafting sidekick, accessible to all budget-conscious DIYers. It’s about making sublimation – the art of transforming designs into cool, lasting prints – something everyone can get their hands on. So, if you’re itching to create professional-looking designs without splurging on high-end gear, stick around.
Sneak Peek of the Journey Ahead:
Hold tight because we’re about to break down the deets on sublimation with an iron. Here’s a glimpse of what’s coming your way:
- Understanding Sublimation: A crash course on the nitty-gritty of the sublimation process, setting the stage for our iron adventure.
- Sublimation with an Iron: Pros and Cons: Weighing the perks and quirks of using an iron for sublimation – is it your DIY soulmate?
- DIY Sublimation Projects with an Iron: Hands-on fun as we explore cool projects you can conquer with just an iron and your imagination.
Understanding Sublimation
Alright, crafty pals, let’s dig into the ABCs of sublimation. We’re talking about transforming your designs into masterpieces using the magic of heat. Traditionally, folks get all fancy with a heat press for this – a dedicated machine that works like a charm. But guess what? We’re skipping the high-tech route and embracing the everyday hero: your trusty iron.
The Sublimation Symphony:
Picture this: you’ve got a design, maybe on special sublimation paper, loaded with sublimation inks. Now, you want to take that design and slap it onto a T-shirt, mug, or any surface your heart desires. That’s where the heat comes in to play maestro.
Sublimation is like a magical symphony where heat turns your ink into a gas. This gas then fuses with your chosen material, creating a bond so tight, it’s like they’ve been besties forever. The result? A vivid, long-lasting design that won’t fade away like yesterday’s news.
Traditional vs. Iron-Powered Sublimation:

Traditionally, people rely on a heat press to get the perfect temperature, pressure, and timing – crucial elements for a flawless sublimation process. But what if you’re just starting out, or you’re a DIYer on a budget? That’s where the iron struts onto the stage, ready to take its place as the people’s choice.
The iron might not be as precise as a heat press, but it gets the job done. It’s like the difference between a grand piano and a trusty guitar – both create beautiful music, just in their unique ways.
Why Go the Iron Route?
Simple – accessibility! Not everyone has a heat press on standby, but most households have an iron. By diving into sublimation with an iron, you’re breaking down barriers and making this awesome craft accessible to everyone. It’s DIY democracy at its finest!
Sublimation with an Iron: Pros and Cons
Welcome back, crafting comrades! Now that we’ve got a grip on the sublimation basics, let’s talk about the real MVP – your trusty iron. Using an iron for sublimation isn’t all sunshine and rainbows, but hey, what craft doesn’t have its quirks and perks? Let’s dive into the world of sublimation with an iron: the pros and cons.
The Pros – Iron’s Superpowers
- Budget-Friendly Wonder: One of the biggest pros of iron-powered sublimation is cost. Most households already have an iron, saving you the moolah you’d spend on a heat press. It’s DIY on a dime!
- Accessible for Newbies: If you’re just wading into the sublimation waters, the iron is a friendly starting point. It’s less intimidating than a heat press, making it perfect for DIY newbies.
- Versatility Galore: Your iron isn’t picky. It can dance its way onto various materials like fabrics, ceramics, and more. That means your designs aren’t limited to one canvas – they can shine on everything from T-shirts to mugs.
The Cons – Iron’s Quirks
- Temperature Control Tango: Unlike a heat press with precise temperature settings, irons can be a bit wild. Achieving that perfect temperature can be a dance, and too much heat can lead to a mess. It’s a balancing act, folks!
- Pressure Predicament: Heat presses provide consistent pressure across the whole surface, ensuring an even transfer. With an iron, you’ve got to put in the muscle to ensure your design sticks everywhere. It’s a bit of a workout!
- Timing Troubles: Timing is everything in sublimation. With a heat press, you get precise timing control. The iron, on the other hand, requires your vigilant eye and a reliable timer. Miss a beat, and your masterpiece might not shine as bright.
Making the Call: Is Iron Sublimation for You?
Now that we’ve laid out the pros and cons, it’s decision time. Is sublimation with an iron the right fit for your crafting escapades? If you’re all about budget-friendly, accessible crafting with a touch of versatility, the iron might just be your crafting sidekick.
However, if you crave precision, consistent results, and you’re willing to invest a bit more, a heat press might be your ticket to sublimation paradise.
Read also: Can YouReuse Butcher Paper For Sublimation
DIY Sublimation Projects with an Iron
Alright, DIY dreamers, it’s time to put those iron-powered sublimation skills to the test! We’ve talked about the ins and outs, the pros and cons – now let’s get hands-on with some DIY sublimation projects using your trusty iron.
Iron-On T-Shirt Extravaganza

Grab a plain T-shirt and let your creativity run wild! Design a graphic or transfer a favorite image onto the shirt using sublimation ink and paper. Lay it flat, give it a good press with your iron, and voila – you’ve just leveled up your wardrobe game.
Pro Tip: Pre-wash your T-shirt to remove any sizing or chemicals that might interfere with the sublimation process.
Ceramic Magic Mugs

Turn a plain ceramic mug into a personalized masterpiece. Print your chosen design on sublimation paper, wrap it around the mug, and secure it in place. Apply heat with your iron, and watch the magic happen as your design transfers onto the mug. Coffee just got a whole lot more stylish!
Pro Tip: Ensure the sublimation paper is tightly secured around the mug to prevent any smudging during the transfer.
Pillowcase Palooza

Give your living room a splash of personality by designing your own custom pillowcases. Create a design, print it onto sublimation paper, and iron it onto the pillowcase. You’ll have a cozy, unique addition to your home decor in no time.
Pro Tip: Opt for light-colored pillowcases to showcase your designs more vividly.
Canvas Bag Creations
Upgrade your tote game with a custom-designed canvas bag. Whether it’s a quirky quote, a vibrant pattern, or a personalized monogram, iron-on sublimation lets you add your flair to an everyday accessory.
Pro Tip: Choose a high-quality canvas bag for better results and durability.
Puzzle Pieces of Art

Transform a plain puzzle into a work of art. Print your image on sublimation paper, piece it together on the puzzle, and use your iron to transfer the design. It’s a unique way to create personalized gifts or display your artwork.
Pro Tip: Iron each puzzle piece individually for more precise results.
Ready, Set, Sublimate!
There you have it – a roundup of DIY sublimation projects you can conquer with your iron. These projects are not only a blast to create but also make fantastic personalized gifts for friends and family.
Essential Tools and Materials
Alright, fellow crafting enthusiasts, now that we’re fueled with inspiration from our DIY projects, let’s talk about the crucial players in the iron-powered sublimation game. Gather around as we explore the essential tools and materials you’ll need to make your sublimation dreams a reality.
Iron (Your Loyal Sidekick)
Your standard household iron takes center stage. Make sure it’s clean and ready for action. While it might not have the precision of a heat press, with a bit of practice, you’ll become the master of temperature control.
Pro Tip: Set your iron to the cotton setting and turn off the steam function for optimal sublimation results.
Sublimation Inks
These are no ordinary inks – sublimation inks transform into gas under heat, ensuring a vibrant and long-lasting transfer. Make sure your printer is compatible with sublimation inks, and load up on the colors that fuel your creative fire.
Pro Tip: Purchase high-quality sublimation inks for better color accuracy and durability.
Sublimation Paper

The unsung hero of the sublimation process, sublimation paper is engineered to handle the heat and release the ink effectively. Ensure your paper is compatible with your printer and is specifically designed for sublimation.
Pro Tip: Use a dedicated sublimation paper cutter for precise sizing of your designs.
Suitable Materials
The beauty of iron-powered sublimation lies in its versatility. Whether it’s fabrics, ceramics, metals, or plastics, your designs can find a home on a variety of materials. Just ensure the material can withstand the heat without warping or melting.
Pro Tip: Test a small, inconspicuous area of your material before committing to the full design to avoid any surprises.
Protective Gear
Crafting is fun, but safety first! Consider using heat-resistant gloves to protect your hands while handling hot materials. Also, work in a well-ventilated area to avoid inhaling any fumes from the sublimation process.
Pro Tip: Keep a dedicated crafting area with good airflow for your sublimation adventures.
Timer and Thermometer

Precision is key in sublimation, and having a timer and thermometer on hand ensures you hit the sweet spot for temperature and timing. It’s the extra mile for top-notch results.
Pro Tip: Invest in a reliable kitchen timer and a non-contact infrared thermometer for accuracy.
Step-by-Step Guide for Iron-on Sublimation
Alright, craft warriors, it’s showtime! We’ve got our essential tools and materials in hand, and now it’s time to dive into the nitty-gritty of iron-on sublimation. Grab your iron, dust off your crafting space, and let’s turn those designs into something magical.
Design Prep Dance
Start by preparing your design on your preferred graphic design software. Make sure it’s the right size for your project and that your colors are popping. When you’re happy with it, flip the image horizontally (mirror it) – this step is crucial for the final result.
Pro Tip: Use high-resolution images for sharper, more detailed prints.
Load Up the Sublimation Printer
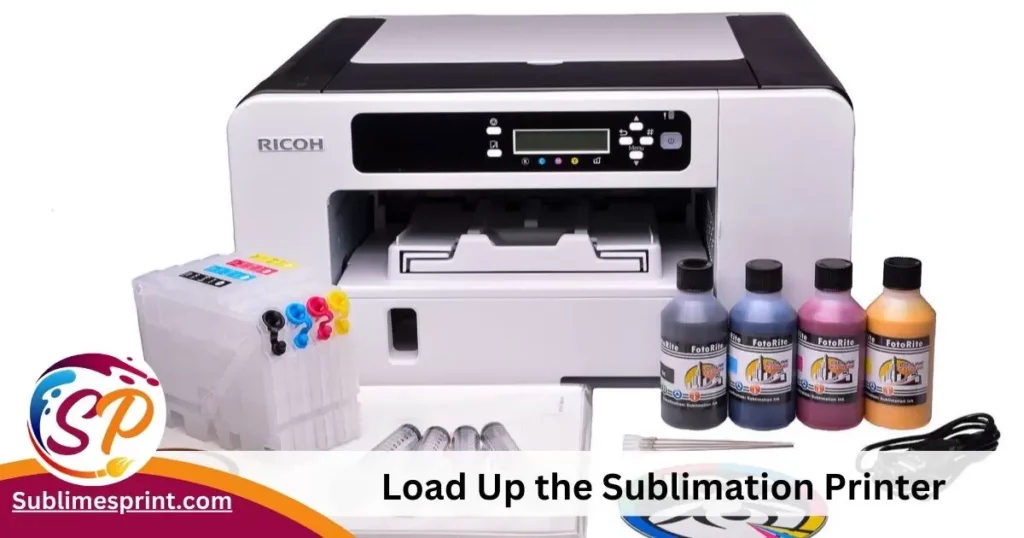
Load your sublimation printer with the special sublimation paper. Print your mirrored design onto the paper, ensuring the ink is evenly distributed. Let it dry completely before moving on to the next step.
Pro Tip: Check your printer settings to ensure they’re optimized for sublimation printing.
Place and Secure Your Design
Position your sublimation paper with the printed design on your chosen material. For example, if you’re working on a T-shirt, lay it flat on a hard surface. Secure the paper in place using heat-resistant tape, ensuring it doesn’t shift during the transfer.
Pro Tip: Tightly secure the edges of the paper to prevent any smudging during the ironing process.
Ironing Ritual
Here’s where the magic happens. Set your iron to the cotton setting and turn off the steam function. Apply even pressure as you iron over the entire design. Work systematically, ensuring you cover every inch. The heat from the iron will turn the sublimation ink into gas, bonding it with the material.
Pro Tip: Iron in circular motions, moving from the center outward, to ensure an even transfer.
Read also: Can You Sublimate On Fleece
Cool Down and Reveal
Once you’ve ironed the entire design, let it cool down. Patience is key here. Once it’s cool to the touch, carefully peel away the sublimation paper. Ta-da! Your design should now be transferred onto your material.
Pro Tip: Avoid touching the design immediately after ironing to prevent smudging.
Final Touches
Admire your handiwork! If you’ve got any lingering sublimation ink residue, a quick wash or wipe with a damp cloth should do the trick. Now, your iron-on sublimation creation is ready to shine.
Pro Tip: Follow the care instructions for your specific material to ensure longevity.
DIY Sublimation Ideas for Home Decor and Gifts
Bravo, crafting maestros! You’ve mastered the art of iron-on sublimation, and now it’s time to let your creativity run wild with some awesome DIY sublimation ideas. Whether you’re jazzing up your living space or creating personalized gifts, these projects are sure to add that special touch.
Customized Coasters
Transform plain coasters into eye-catching pieces of functional art. Print your favorite designs on sublimation paper, iron them onto the coasters, and watch your coffee breaks get an instant upgrade.
Pro Tip: Opt for heat-resistant coasters for a durable finish.
Photo Collage Pillow

Create a cozy masterpiece by transferring a photo collage onto a pillowcase. It’s like a scrapbook on a pillow – perfect for reliving cherished memories every time you snuggle up.
Pro Tip: Choose photos with vibrant colors for a more striking result.
Inspirational Wall Art

Print your favorite quotes or affirmations on sublimation paper and iron them onto canvas for inspirational wall art. It’s a fantastic way to surround yourself with positivity.
Pro Tip: Experiment with different fonts and layouts for added visual interest.
Pet Portrait Mouse Pad

Showcase your furry friend’s adorable face on a custom mouse pad. Print a high-resolution image onto sublimation paper, iron it onto the mouse pad, and brighten up your work or gaming space.
Pro Tip: Capture your pet’s personality in the photo for an extra special touch.
Personalized Puzzle Mat
For the little ones in your life, create a puzzle mat with their favorite characters or designs. Print the images on sublimation paper, iron them onto each puzzle piece, and let the fun begin.
Pro Tip: Use large, simple designs for easy recognition by small children.
Seasonal Tea Towels
Spruce up your kitchen with seasonal-themed tea towels. Print festive designs on sublimation paper, iron them onto plain white towels, and make your kitchen the heart of every celebration.
Pro Tip: Swap out designs based on holidays or seasons for a dynamic kitchen decor.
Magnetic Fridge Art
Turn your fridge into an art gallery by creating magnetic sublimation designs. Iron your chosen images onto magnetic sheets, cut them into shapes, and let your fridge become a rotating showcase.
Pro Tip: Experiment with fun shapes like animals, flowers, or quirky symbols.
Troubleshooting and Quarries
Alright, crafters, let’s address the elephants in the room – those common hiccups that might pop up during your iron-on sublimation adventures. Don’t fret; we’ve got your back with some troubleshooting tips and Quarries to keep your crafting journey smooth.
Why Is My Design Fading After Washing?
If your design is losing its vibrancy after a wash, fear not. This could be due to under-pressing. Ensure you apply enough pressure with your iron and follow the recommended time for each project. If in doubt, a little extra heat and time won’t hurt.
Pro Tip: Check the manufacturer’s recommendations for the optimal sublimation settings.
Help! My Design Smudged!
Smudging can be a real bummer. This might happen if the sublimation paper isn’t securely taped down or if you accidentally move it while ironing. Make sure your paper is firmly fixed in place before starting the ironing process.
Pro Tip: Use heat-resistant tape to secure all edges of the sublimation paper.
The Colors Aren’t as Vibrant as I Hoped. What Gives?
If your colors aren’t popping as much as you’d like, it could be a couple of things. Check your sublimation inks – are they running low or expired? Ensure your printer settings are optimized for sublimation printing to get the best color output.
Pro Tip: Invest in quality sublimation inks for more vibrant and long-lasting results.
My Iron Isn’t Heating Up Consistently. Any Advice?
Consistent heating is crucial for successful sublimation. Ensure your iron is set to the cotton setting, and if it has a steam function, turn it off. Iron in circular motions, distributing heat evenly across the entire design.
Pro Tip: Let your iron heat up adequately before starting the transfer process.
I Can’t Get the Timing Right. Any Suggestions?
Timing is a delicate dance in sublimation. If your designs aren’t transferring well, try extending the ironing time slightly. A few extra seconds can make a significant difference, especially for larger or more intricate designs.
Pro Tip: Keep a reliable timer on hand and experiment with timing for optimal results.
FAQs
Can you sublimate on iron-on vinyl?
No, sublimation works best on materials that can absorb ink and withstand high heat. Iron-on vinyl is not porous enough for sublimation to work effectively.
What setting on the iron is 300 degrees?
Typically, the cotton setting on your iron is around 300 degrees Fahrenheit. Check your iron’s manual to be sure, and adjust as needed.
Can I use a flat iron for transfer paper?
Yes, you can use a flat iron for transfer paper. Set it to the cotton setting and apply even pressure when ironing for the best results.
Do you peel sublimation hot or cold?
It’s recommended to peel sublimation when it’s cold. Let your project cool down before removing the transfer paper for the best outcome.
Can you use an iron instead of a Cricut press for sublimation?
Yes, you can use an iron, but keep in mind that a heat press provides more consistent temperature and pressure, ensuring better results. If an iron is your only option, follow the temperature and pressure guidelines as closely as possible.
Can you do sublimation on stainless steel?
Yes, sublimation can be done on stainless steel. Ensure the steel is coated with a special sublimation coating to improve the adhesion of the ink.
How durable is sublimation printing on metal?
Sublimation printing on metal is quite durable. The ink becomes part of the metal surface, making it resistant to scratches and fading. However, avoid harsh abrasives to maintain the quality over time.
Conclusion
And there you have it, creative wizards! Our journey through the magical realm of sublimation with an iron has reached its final chapter. We’ve explored the basics, uncovered the pros and cons, embarked on hands-on projects, dived into essential tools and materials, mastered the step-by-step guide, unleashed our creativity with DIY ideas, and tackled troubleshooting like seasoned craftsmen.
As you step back from your crafting station, adorned with your newly sublimated creations, take a moment to relish in the magic you’ve made. Whether it’s a personalized T-shirt, a cozy pillow, or a set of vibrant coasters, each piece is a testament to your creativity and resourcefulness.
Remember, the iron isn’t just a household tool – it’s your crafting sidekick, turning everyday items into works of art. The accessibility and versatility of iron-on sublimation make it a fantastic addition to any DIY arsenal.

I’m Justin Taylor, the go-to guy at “Sublimes Print.” I’ve been playing with colors and paper for a while now, and I want you to join me on this cool journey. At Sublimes Print, we’re all about making things look awesome on paper. It’s not just printing; it’s like turning ideas into real, colorful magic. Come along, and let’s make your ideas pop on paper together!